Unlike the majority of other artistic tools, the airbrush requires occasional maintenance. Such as cleaning, lubricating, fixing, and making minor adjustments. But in order to do such maintenance, you must know how to properly disassemble the airbrush first.
Now, taking apart an airbrush is quite simple, but it must be done in a strategic & careful manor in order to prevent damaged to airbrush parts / components. Otherwise you run the risk of damaging expensive parts that will then need replacing.
For example, the airbrush needle and nozzle are likely the most fragile parts of the entire airbrush. Especially the needle tip (It will bend easily). Improper care when disassembling or reassembling an airbrush is likely to result in damaged parts, so please do so with care!
That being said, if your reasoning for disassembling your airbrush is to replace either a damaged needle or nozzle? I’d suggest you review my article on replacing airbrush needles and nozzles, because you can easily damage other parts when trying to remove a bent needle if not done correctly… In that step by step guide I give you a few options for needle an nozzle removal.
Anyway, I must start out by stating, this tutorial will be mainly geared toward the disassembly process of a double action airbrush. Nonetheless, the steps found below will likely apply (Minus a few steps) in the disassembly process of a single action airbrush.
But it is important to note, that not all airbrushes are created the same…
What do I mean by this?
Different airbrush makes and models come manufactured with slightly different parts. Now these parts commonly match the functionality across the board, but they won’t always look the exact same from one airbrush to the other…
Simply said, some of the steps below may be obsolete to you on rare occasion… My overall goal with this guide is versatility so it applies to the vast majority of airbrush makes and models out there.
I will be using an Iwata Neo for this demonstration.
Quick Tip, If you find yourself getting stuck in the disassembly process, Simply look up (On the internet) an “Exploded View” of the exact make and model of airbrush your working with. I personally used This One provided on the Iwata website when I began learning the Neo.
Though there are many different ways to go about disassembling an airbrush. The following way is the best I have found in terms of simplicity, and limited risk of damage to components.
Steps To Disassemble An Airbrush (In Order)
In order to make the disassembly process as simple as possible we will be starting at the back of the airbrush and working our way toward the front.
This will not only keep fragile parts protected during the process, but will also make the process easily memorable, and safe. Because as you may know, the tip of the needle is quite sharp, and can easily puncture skin.
Quick note before we get started, It is best to take apart your airbrush in a clean and clutter free area. I personally prefer to disassemble my airbrush on a soft surface with some give, like on a clean towel, or blanket.
This keeps parts stationary. Airbrush parts are very small and will commonly roll around, making it very likely for parts to fall off the table and get lost…
On that same note, organization is key when it comes to disassembling, really anything.
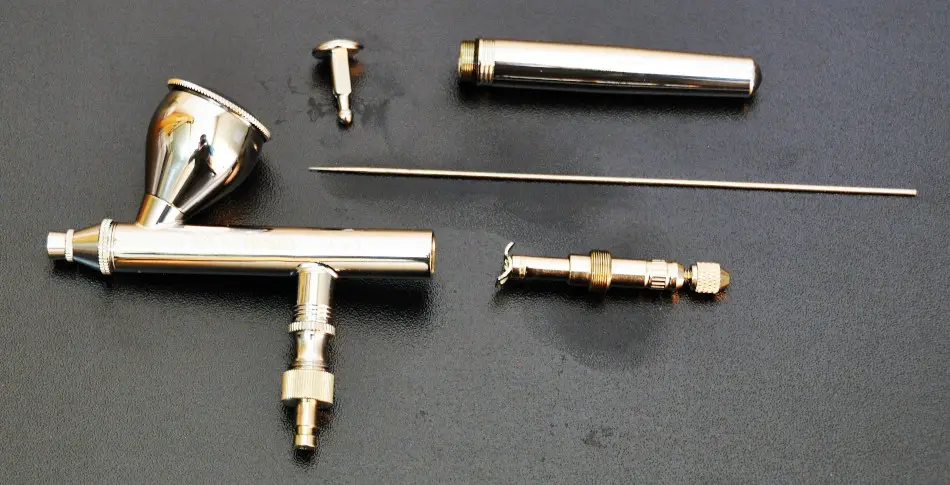
Its recommended that you lay out each part removed from the airbrush in the same order it was removed, this will make reassembly a breeze.
For you visual learners, I have created a video demonstrating the exact process. But shortly down this page will be close up photos of each part being removed, for further clarity.
Oh, and its important that you inspect each part, along with the o’rings and seals during the disassembly process and replace what needs replacing before re-assembly.
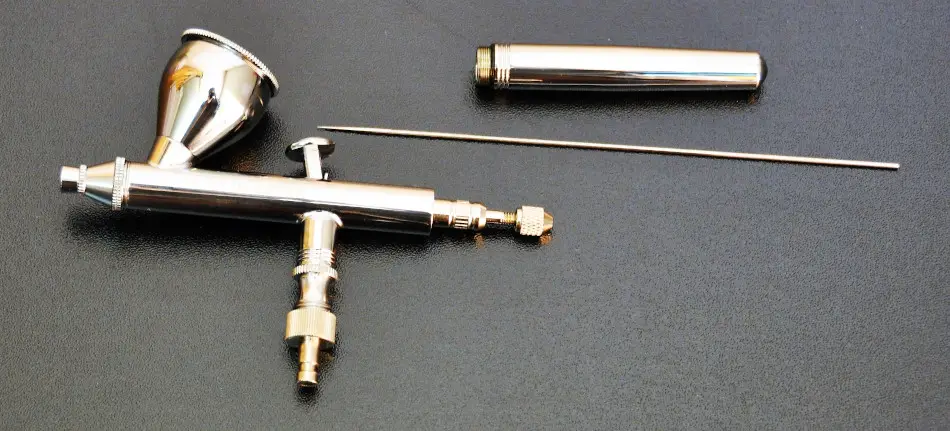
1: Remove Handle
Located at the tail end of the airbrush, Simply begin to unscrew the handle
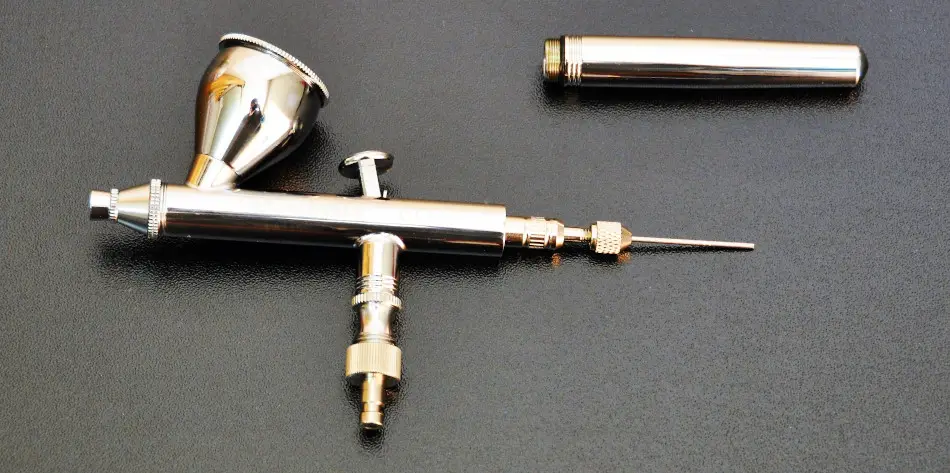
Remember to inspect the o’ring / seal on the handle of the airbrush. Not every airbrush will have an o’ring here but many will.
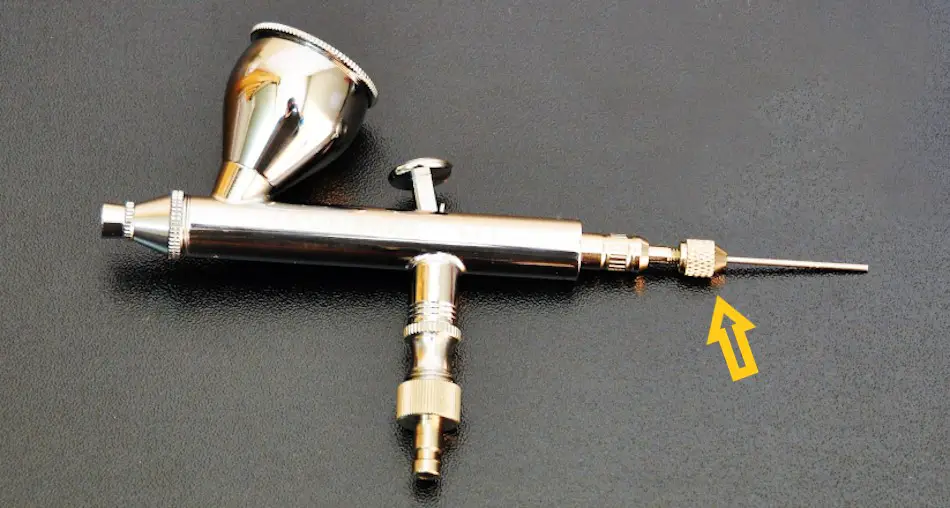
2: Loosen Needle Chucking Nut (Needle locking nut)
Located at the tail end of the airbrush, formally inside the handle (prior to removal), you will find a small nut known as the needle chucking nut. Loosen that with your fingers. Though you can remove it completely, its ideal to only loosen it, as the entire inner cartridge will remove in pieces rather then in full if fully removed.
Which isn’t a big deal, I just prefer to keep the inner cartridge in one piece, and disassemble it outside of the airbrush… I find it easier that way, but its all just personal preference.
We will discuss removing the inner cartridge in full, and disassembling it shortly if you wish to remove it in full later.
So either loosen the needle chucking nut if you wish to remove the inner cartridge in full shortly, or completely remove the needle chucking nut if you wish to disassemble the inner cartridge inside the airbrush.
3: Remove Needle
Next, gently grab the rear of the needle, and gently pull it out of the airbrush. It should remove quite effortlessly, however paint buildup on the needle could make it feel sticky at the start of the pull.
Make note of the needle tip, and be careful not to damage it, or yourself… The needle tip is very sharp and will easily puncture skin. Orient it on your table in a way that protects it from damage as well as you.
If needle tip is bent or damaged, alternative removal method should be considered. Review my post on how to remove and change a damaged airbrush needle and/or nozzle, for alternative needle an nozzle removal methods.
4: Remove Inner Cartridge
Simply un-threading the Needle Spring Guide (Which is commonly threaded to the inner part of the airbrush body) will allow the entire Inner Cartridge to come out the back of the airbrush. Make note of the direction of the Main Lever / Trigger, which will be removed in the following step. Because once the inner cartridge is removed the trigger will easily fall out.
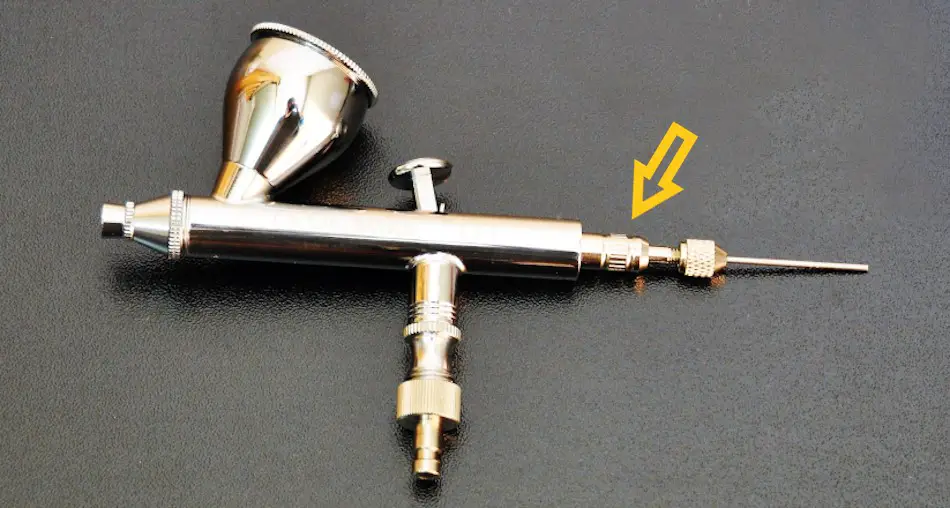
Note, The threads on the needle spring guide are quite long, and will likely take a moment to completely loosen for removal.
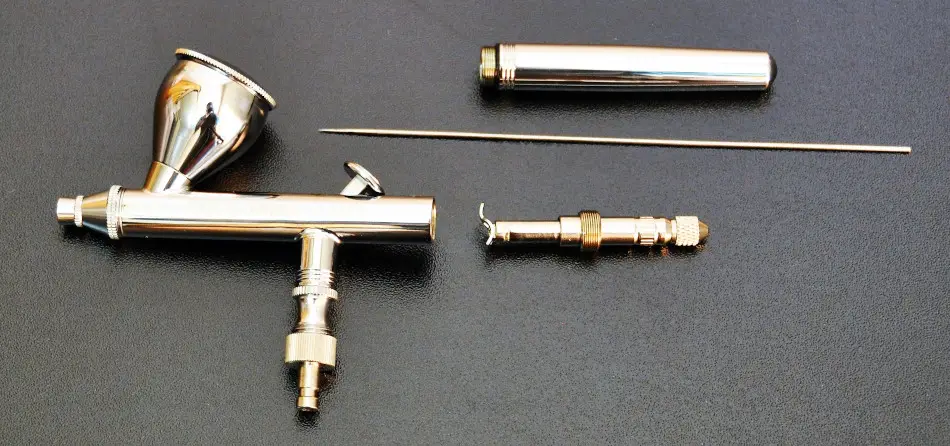
Once you have the Inner Cartridge out of the airbrush body, you can begin disassembling the inner cartridge. Assuming you decided to remove the inner cartridge in full before disassembly, rather then disassembling it when still in the airbrush body.
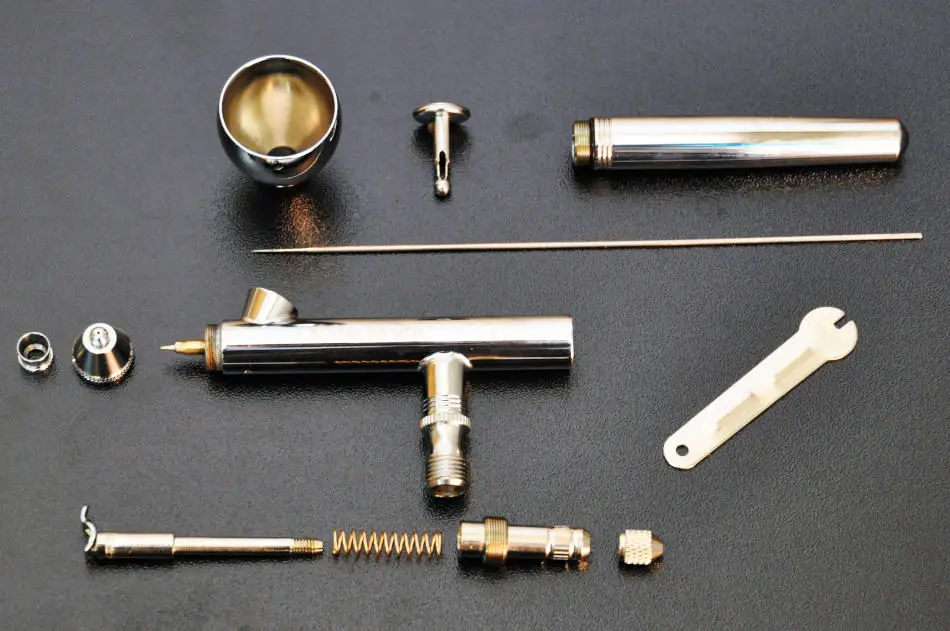
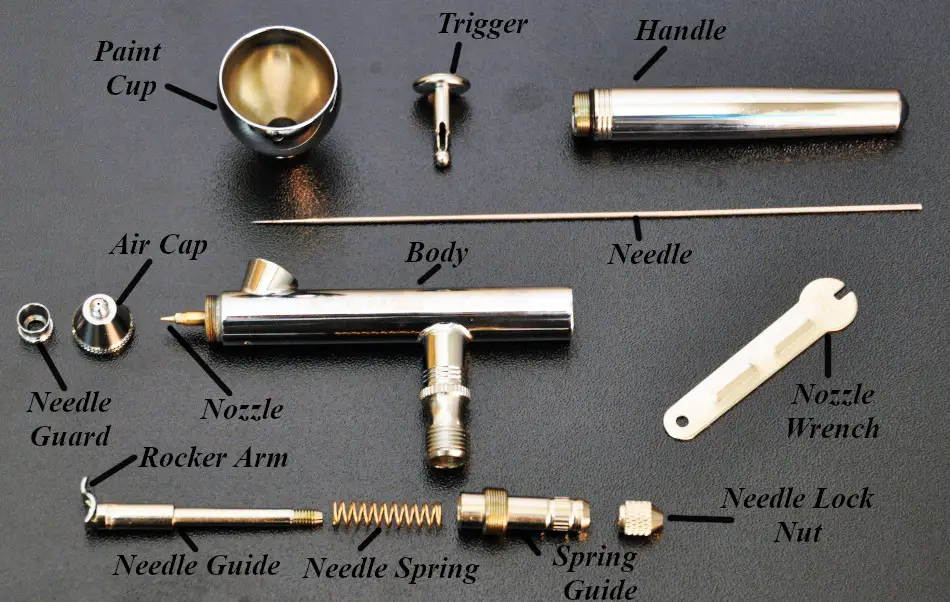
The inner cartridge typically consists of 5 major parts in order from back to front.
- The Needle Chucking Nut (Needle locking nut) – As loosened Above In Step 2
- The Needle Spring Guide
- The Needle Spring
- The Needle Chucking Guide
- Trigger / Lever Rocker Arm
Simply remove the Needle Chucking Nut that was previously loosened, and the entire assembly should fall apart. Be careful, as the Needle Spring may be under load, making it easy for parts to go flying across the room.
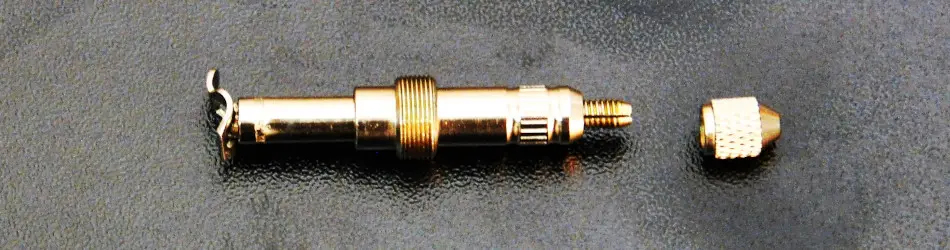

Some times the Trigger Rocker Arm will not be mounted directly to the Needle Chucking Guide (Depending on the airbrush). If this is the case you’ll need to ensure it doesn’t get left in the airbrush accidentally, and later lost.
Assembly of the airbrush will very slightly if the Rocker Arm is disconnected from the needle chucking guide, but it shouldn’t be to difficult to deal with when it comes time to re-assemble the airbrush. We will discuss assembling the airbrush on the next page.
5: Remove Lever / Trigger
If not done so in step 4, Make note of the trigger direction. Typically there will be some sort of factor that differs the front of the trigger to the back. This will be important for the reassembly process.
Located on top of the airbrush, behind the paint cup (If using a gravity feed airbrush) you’ll find the Main Lever, otherwise known as the trigger. Given that the inner cartridge was pulled out prior to the trigger, all tension holding the trigger in place is now removed.
This means the trigger will simply fall out if you tip the airbrush upside down.
6: Remove Paint Cup (If Re-movable)
If you have a removable paint cup (meaning the paint cup threads on, or compresses into the airbrush body, now is a good time to remove it. This will make cleaning the body of the airbrush easier.
Either on top of the airbrush, or on the side of the airbrush will be the paint cup, depending on if your taking apart a gravity feed or side feed airbrush. If your disassembling a siphon feed airbrush, odds are you’ve removed the paint bottle long before starting the disassembly process. If not, do so now.
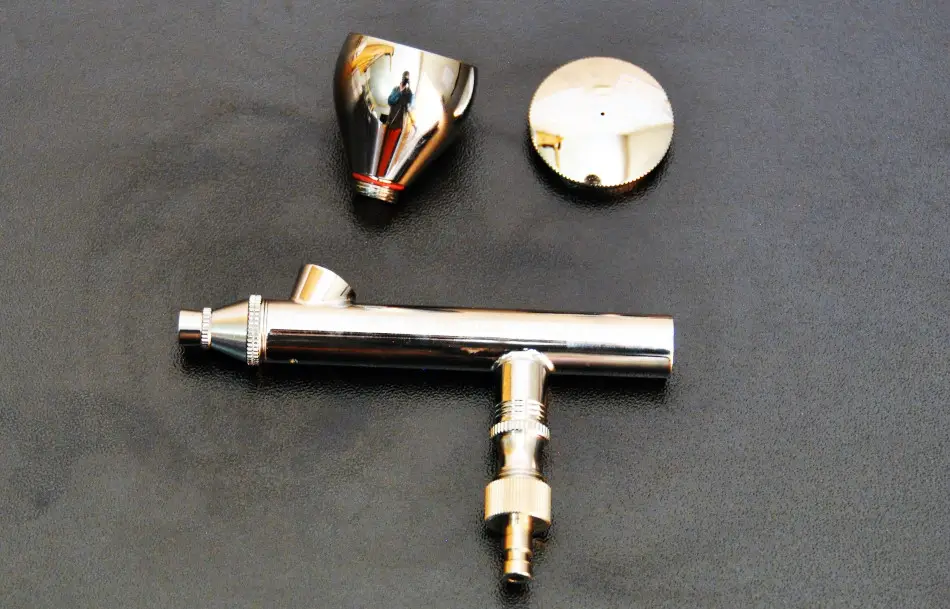
Note, not all airbrushes are manufactured with a re-movable paint cup. Many airbrushes have the paint cup machined into the body of the airbrush (If this is the case for you, simply skip this step).
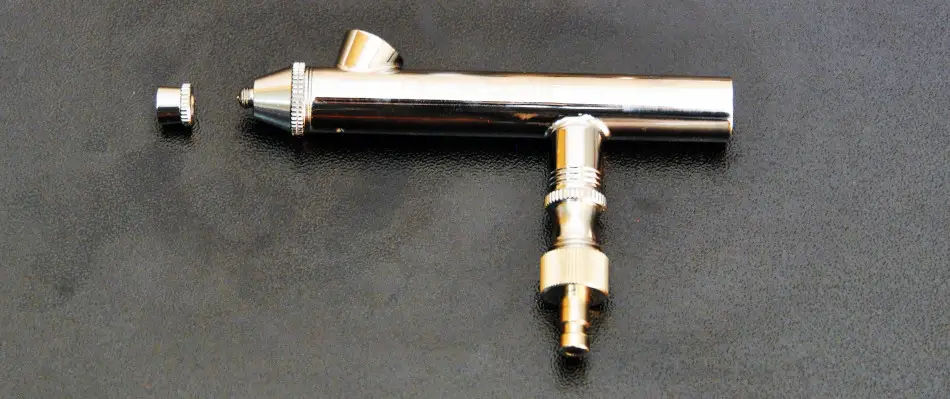
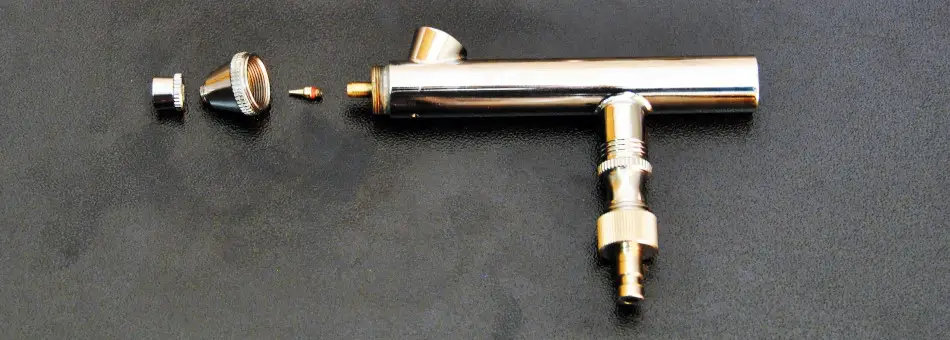
7: Remove Needle Cap / Needle Guard
Now we have made our way to the front of the airbrush.
Right at the nose of the airbrush will be the needle cap, otherwise known as the needle guard.
Simply un-thread the needle cap and set aside.
At this point on your going to be working with very small parts. Take extra precaution, so you don’t loose any.
8: Remove Nozzle Cap / Air Cap
Located at the front of the airbrush, Behind the Needle Cap / Needle Guard (Previously removed) will be the Nozzle Cap / Air Cap. Simply remove it.
Typically the nozzle cap is threaded onto the airbrush body, but different designs employ different methods for attachment.
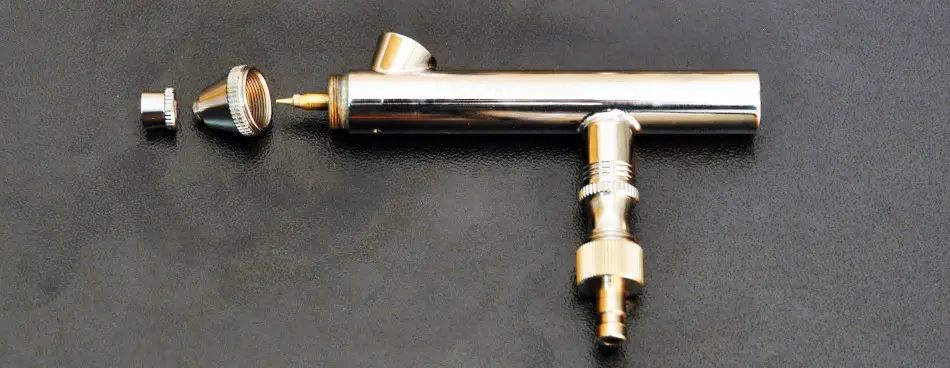
9: Remove Nozzle (Gently)
The one thing that varies substantially from one airbrush model to the other is the Nozzle and its means for attachment. Some Nozzles, are threaded onto the airbrush body (Like the airbrush used for this demonstration, “Iwata Neo”), while others are machined precisely to press inside the airbrush body, or against the airbrush body.
Nonetheless, airbrush Nozzles all provide the same function.
Note, You may need a special tool in order to remove the airbrush nozzle (Depending on the make an model of airbrush). For example, some of the Iwata airbrushes require a small wrench in order to remove threaded nozzles. But under many circumstances the tools needed will be included with the airbrush at purchase.
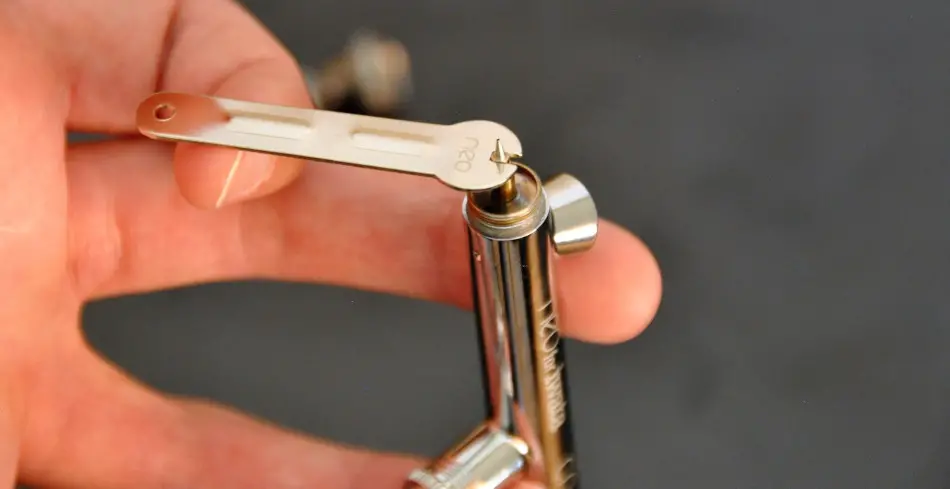
The nozzle is one of the smallest components of the airbrush, Be very careful not to drop it and loose it… I’ve done this, and it can be a bugger to find, especially in carpet.
Conclusion
Disassembling an airbrush can be quite intimidating to start. But once you’ve done it a few times the process becomes almost second nature, and by utilizing proper steps for doing so there is not likely ever going to be an airbrush you won’t be able to take apart!
Just make sure you do so carefully, and be sure not to force things. One of the worst things you can do is over tighten parts, resulting in stretched threads or completely sheered off threads.
Always ensure you are loosening a part, instead of accidentally tightening it… I have personally done this, and it’s not fun to deal with, especially when the threads you damaged were of the main components.
Here are the airbrush disassembly steps for quick reference:
- Remove Handle
- Loosen Needle Chucking Nut (Needle locking nut)
- Remove Needle
- Remove Inner Cartridge
- Remove Lever / Trigger
- Remove Paint Cup (If Re-movable)
- Remove Needle Cap / Needle Guard
- Remove Nozzle Cap / Air Cap
- Remove Nozzle (Gently)
Once you are finished with your airbrush maintenance, I will walk you through the reassembly process. Click the button below for my guide on assembling an airbrush, because, Yes, there are added steps in the assembly process that need to be considered.
Anyway, I hope you were able to find some value here! If you have any further questions regarding the airbrush do be sure to take a look around the website. Airbrush Insider is dedicated to helping all in the airbrush community!
This is Colt signing off!
Check Out Some Of My Favorite Airbrush Equipment: