Assuming your airbrush is currently in many pieces, we will be going through the entire airbrush re-assembly process, and along the way we will be lubricating and sealing specific parts so that next time you go to use your airbrush it will operate flawlessly, and do so for long to come!
Because as we all know, taking proper care of your airbrush will not only make it function better, but also allow it to last longer.
And who doesn’t want a smooth operating airbrush?
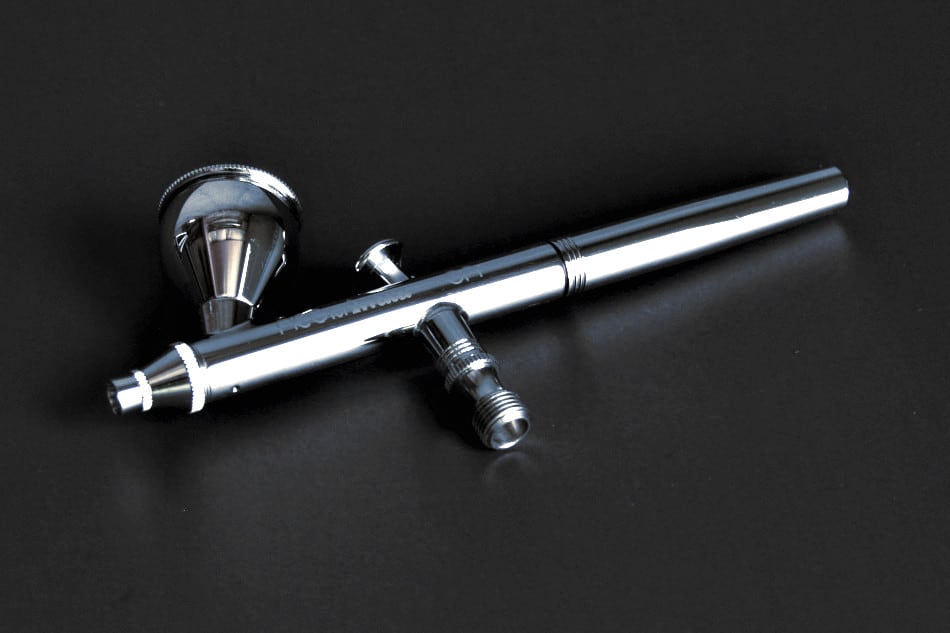
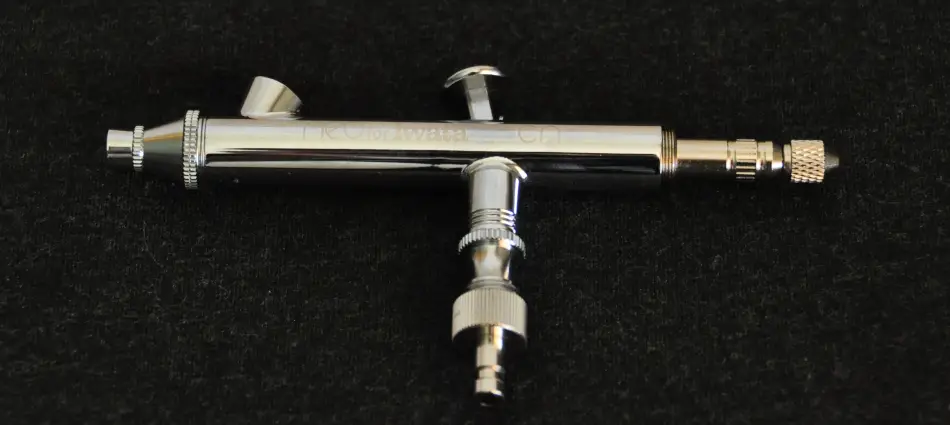
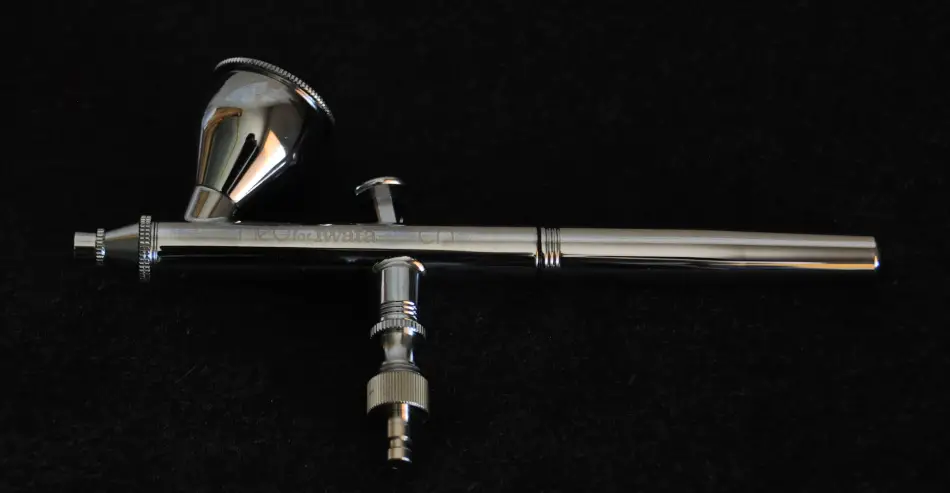
Anyway, for this demonstration, I’ll be using the Iwata Neo. But the process should be quite similar for any double action airbrush (Plus or minus a few parts here and there).
If you find you run into any difficulty during the process, try looking up an “exploded view” of your exact make and model of airbrush on the internet. This will likely be of great value during the assembly process!
Now, assuming you have already disassembled you airbrush… Lets begin the re-assembly process!
Steps To Lubricate, Seal & Assemble An Airbrush
For the Assembly process, We’ll begin at the front of the airbrush and work our way toward the back. The goal is to assemble the airbrush in an efficient and strategic manor so fragile components are not exposed for long, Reducing the likelihood of damage occurring to such components.
Note, its important to seal and lubricate certain components on the airbrush during assembly, otherwise the result will be a dis-functional airbrush that gives you all kinds of troubles. Each part that needs a seal / sealant, as well as lubricant will be specified in each step below. But take it easy with the Lube… A little will go a long way.
- Lubrication requirements for each step will be Highlighted in: Green
- Sealing requirements for each step will be Highlighted in: Blue
Sealing Tip: Many airbrushes come with rubber O’ring seals, which isn’t a big deal when airbrushing using water-based paints. It becomes an issue when using solvent-based paints. Simply because, solvents will eat at the rubber seal essentially dissolving the seal. Meaning, your airbrush is no longer sealed properly.
When using solvent based paints, opt for Teflon seals.
My Favorite Alternative Airbrush Sealants
Aside from factory replacement seals, I like to use the following where I can to save a few bucks. Your welcome to try them where needed if you’d like!
- Teflon Tape – Ideal For Threaded Parts & Hold’s Up Against Solvents (Available On Amazon)
- Beeswax – Ideal For Threaded Parts (Available On Amazon)
- Chap-Stick – Ideal For Threaded Parts(Available On Amazon)
My Favorite Airbrush Lubricants
- Paasche Airbrush Lube – Great For Any Airbrush (Available On Amazon)
- Iwata Super Lube – Great For Any Airbrush (Available On Amazon)
- Really Any Quality Machine Oil Will Work Good As Well
Anyway, enough blabbing… Lets start building!
Now for you visual learners, I have created a step-by-step tutorial video on the complete airbrush assembly process. But stay tuned, as I go into further detail in each step below. Enjoy!
Video Demonstration of the entire process (Coming Soon)
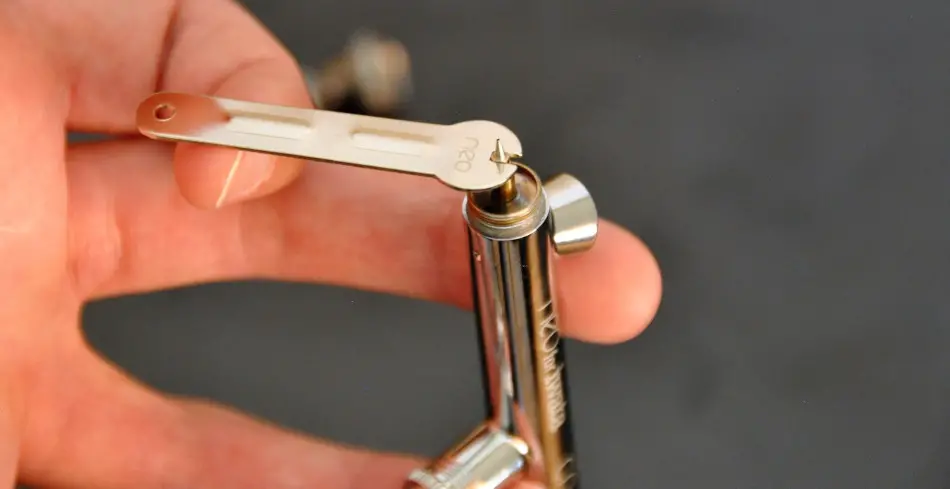
1: Install Nozzle
Lets begin the assembly process by installing the Nozzle.
Now, there are a multitude of different Nozzle attachment designs out there. But most common is Threaded, and Press Fit.
If your nozzle is threaded refer to the sealing options listed below so you don’t get air leaks.
As well, threaded nozzles commonly require a small wrench of sorts to seat the nozzle properly. If this is the case for you (As is with the Neo), be careful not to over tighten the nozzle, as this can lead to stretched threads, or even sheered off threads…
Check Nozzle Seal and Lubrication requirements below↓
Nozzle Lubrication Requirements:
Lubrication Is Not Commonly Required For Nozzle Installation.
Nozzle Seal Requirements & Options:
A Seal / Sealant Is Commonly Required For Threaded Nozzles. If the nozzle has / had a O’ring on it, or the threads feel sticky, odds are it needs to be sealed with either a factory O’ring replacement, or one of the alternative sealing options listed at the top of this article. Self centering nozzles don’t commonly need a seal (Depends on the make and model of airbrush).
Note: If the factory seal looks to be in good shape you may consider re-using it.
2: Install Nozzle Cap / Air Cap
Followed by the nozzle will be the Nozzle Cap. Now, depending on the design behind your airbrush. The Nozzle Cap may apply inward pressure on the nozzle as you tighten it down (Common for self centering nozzles).
If this is the case for you, be mindful of the nozzle.
Otherwise simply threading on the nozzle cap will do. But careful not to over tighten it.
Oh, and a, Sealing the nozzle cap it usually vital no matter the airbrush your working with. If air can escape around the cap, atomization will be limited.
I’ll show you a little trick at the end of this article to ensure you have sealed the airbrush before you go to use it.
Check Nozzle Cap Seal and Lubrication requirements below↓
Nozzle Cap Lubrication Requirements & Methods:
Lubrication Is Not Commonly Required Here. Unless using an O’ring as your seal method. I’ll be using Beeswax to seal the Nozzle Cap on this “Iwata Neo”, which inherently acts as a thread lubricant as well.
Parts To Lube:
- Threads: Lubricate the threads of the Air Cap only if using a Rubber or Teflon O’ring seal. Alternative sealant methods will double as a thread lubricant.
Nozzle Cap Seal Requirements & Methods:
A Seal / Sealant Is Commonly Required For Air Cap Installation. If the Nozzle Cap has / had a seal on it, or feels sticky around the threads, odds are it needs to be sealed using either a factory replacement seal, or an alternative sealant listed at the top of this article. I’ll Be using Beeswax as my sealant of choice on this “Iwata Neo”
If you opt to use Beeswax, or Chap-stick as your sealant of choice (Like I). I like to use a lighter to slightly heat it up so it flows around the threads on the airbrush body. If you choose to try this, be very careful not to over head your airbrush. (I demonstrate this in the video above, it you’d like to see it done.)
3: Install Needle Cap / Needle Guard
Followed by the nozzle cap will be the Needle Cap. The needle cap is important, as it protects the tip of the needle from damage.
Under most circumstances all you’ve got to do is thread it on. But like always, careful not to over tighten it.
Check Needle Guard Seal and Lubrication requirements below↓
Needle Guard Lubrication Requirements & Methods:
Lubrication Is Not Commonly Required Here.
Needle Guard Seal Requirements:
A Seal / Sealant Is Not Commonly Required Here.
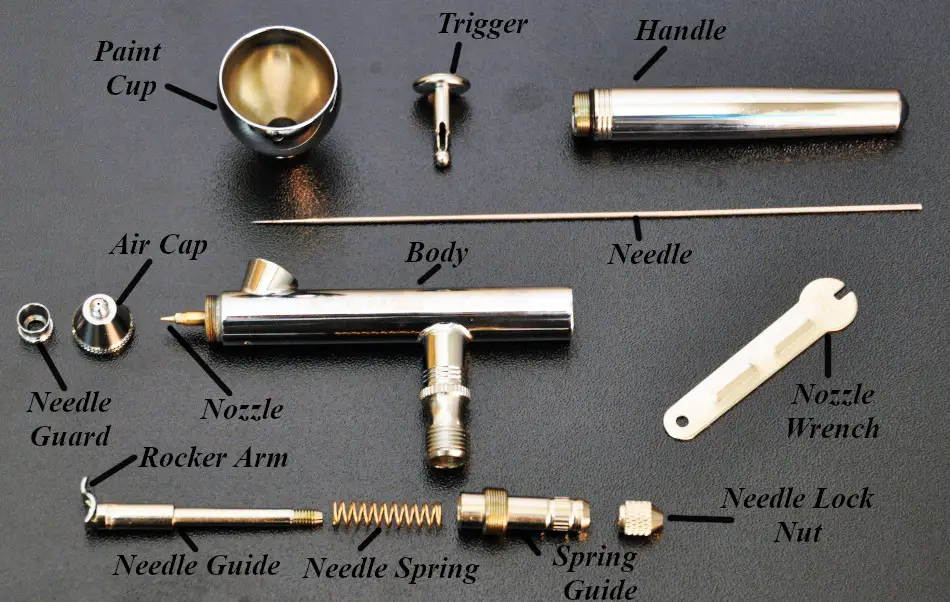
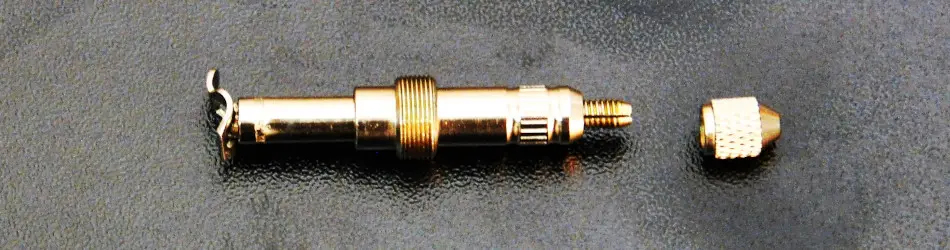
4: Assemble Inner Cartridge (Can Be Done In Airbrush)
Before we get started It’s important to note, The Inner cartridge assembly can be assembled inside the airbrush, or apart from the airbrush. I personally choose to assemble it apart from the airbrush, then insert it into the airbrush (Done in next step).
But you can (and many need to) assemble the inner cartridge inside the airbrush, as the Rocker Arm on the Needle Guide can be difficult to get inside the tail end of the airbrush.
Simply slide each component together in the assortment seen in the image below, and loosely thread on the Needle Lock Nut.
Note: Assembling the Inner Cartridge inside the airbrush will be done in the same orientation, just each part will go into the tail end of the airbrush 1 at a time. The only difference is you can thread the Spring Guide into the airbrush body before threading on the needle lock nut.
Check Inner Cartridge Assembly Seal and Lubrication requirements below↓

Then loosely thread on the Needle Lock Nut to keep everything from falling apart.
Inner Cartridge Assembly Lubrication Requirements:
Lubrication Is Commonly Required Here. Since there is going to be a lot of continuous metal on metal contact (so to say) in the Inner Cartridge, it is ideal to lubricate it well.
Parts To Lube:
- Lubricate The Threads: By applying a small amount of Lube to the threads it reduces wear during the airbrush disassembly and re-assembly process.
- Lubricate The Spring: Springs move a lot and lubricating the spring, and the shaft its on will reduce wear, and improve movement.
- Lubricate The Needle Guide Shaft
- Lubricate The Rocker Arm: That small pivoting part that rests behind the trigger. It Moves any time you pull back on the trigger for paint. Lubing it can reduce friction, and increase life.
Inner Cartridge Assembly Seal Requirements:
A Seal / Sealant Is Not Commonly Required Here.
5: Loosely Thread In Inner Cartridge
Now that the Inner Cartridge is Lubricated and assembled, you can begin Inserting it into the airbrush body.
But be sure to make note of the rocker arm positioning. Its Ideal if you pivot the rocker arm all the way forward (So the top is forward) before insertion. This will keep it out of the way, and lined up for the trigger cut out (on top of the airbrush).
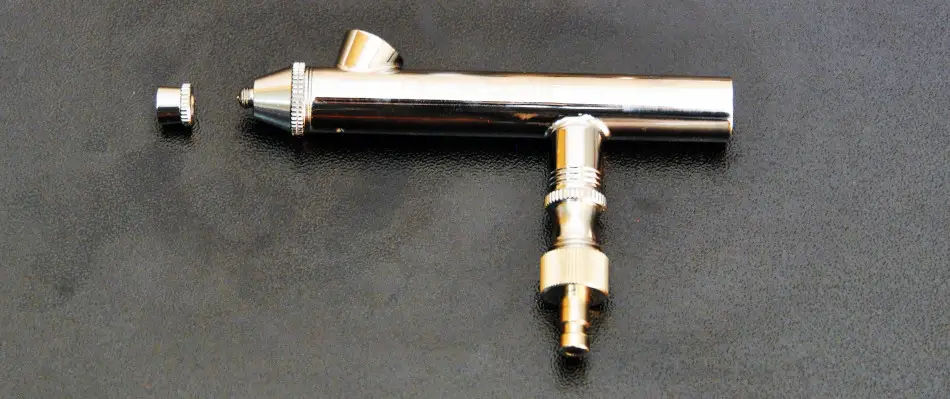
Now, if the rocker arm is not mounted directly to the Inner Cartridge (As is not the case for the “Neo”), you are going to need a small pare of pliers, or small fingers, and a steady hand. What you’ll do is insert the inner cartridge into the airbrush As seen in the image below, then using some small pliers you’ll set the rocker arm in through the top of the airbrush (Trigger cut out) and rotate it into place against the front of the inner cartridge.
Its easiest to do if you aim the front of the airbrush upward. Once you’ve got the rocker arm in place, quickly move on the step 6 (Below). (The direction of the rocker arm should match the image above in step 4).
The reason you are only going to loosely thread in the inner cartridge is so we can easily insert the trigger mechanism.
Check Inner Cartridge Seal and Lubrication requirements below↓
Lubrication Requirements & Methods:
Lubrication Is Commonly Required Here.
Parts To Lube:
- Lubricate The Threads on the airbrush body: By applying a small amount of Lube to the threads it reduces wear during the airbrush disassembly and re-assembly process.
Seal Requirements & Methods:
A Seal / Sealant Is Not Commonly Required Here.
6: Install Lever / Trigger
The reasoning for not fully inserting the inner cartridge above is to make placement of the trigger a breeze.
All you need to do is drop the trigger through the hole in the top of the airbrush. But ensure you place the trigger the correct direction. Its common for an airbrush to have a cut out on the under side of the trig finger platform. This cut out is commonly directed toward the rear of the airbrush.
Other triggers will be rolled on one side of the finger platform with micro groves for added grip. If this is the case for you, place the rolled side w/ groves toward the front of the airbrush.
You’ll know the trigger is in place when it feels spongy when pressed, or if air flows (if the airbrush is hooked up to air)…
Check Trigger Seal and Lubrication requirements below↓
Trigger Lubrication Requirements & Methods:
Lubrication Is Commonly Required Here.
Parts To Lube:
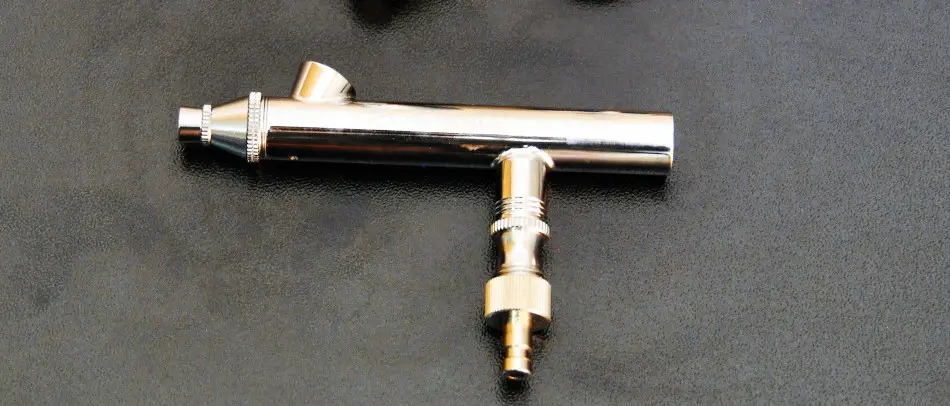
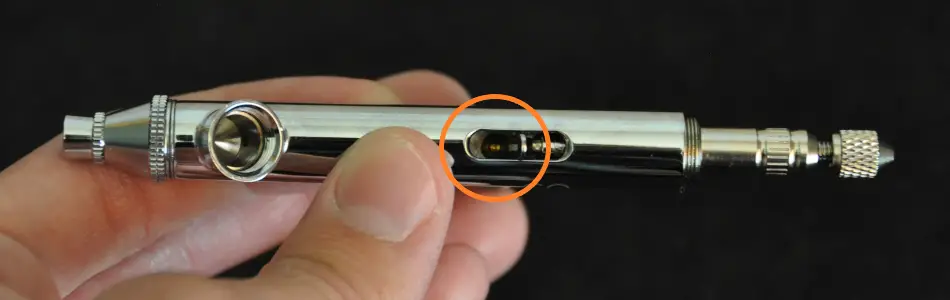
- Lubricate The Air Valve: The air valve is located under the trigger when the trigger is placed in the airbrush (Circled above in image). The air valve is know for getting a little sticky from time to time. By applying a small amount of lube you can reduce or eliminate the stick. Do so using a Q-tip (Or Equivalent) moistened with lube.
Trigger Seal Requirements:
A Seal / Sealant Is Not Commonly Required Here.
7: Finish Threading In Inner Cartridge
Now that the trigger is placed. You can finish threading in the inner cartridge.
This will begin to put some tension on the trigger, holding the trigger into place.
Quick Trick: By threading the inner cartridge in until it seats, then backing it out a little will reduce the pull tension on the trigger. Making it easier for you to pull back the trigger. But careful not to back it out to far, otherwise the tail end of the needle will interfere with the handle when it’s being installed (Step 10).
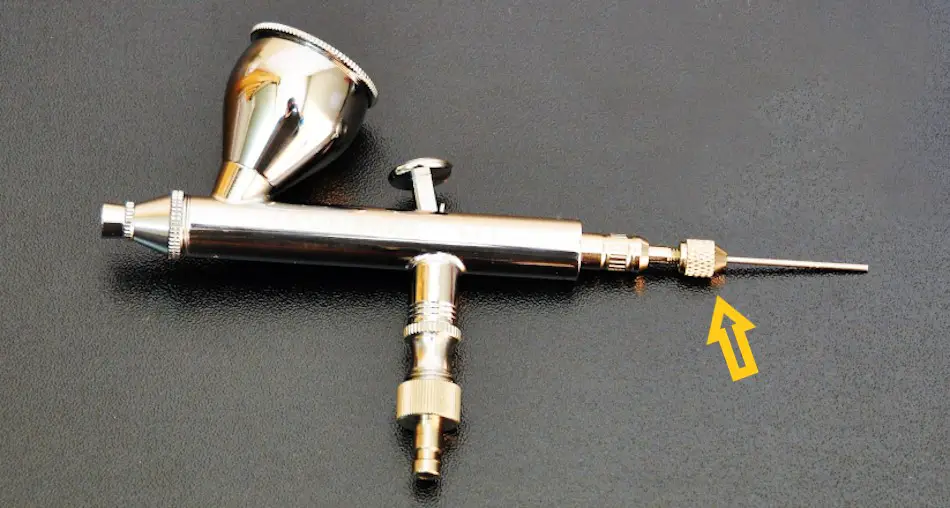
8: Install Needle
Now simply install the needle starting at the tail end of the airbrush. Ensure the needle lock nut is loose so the needle will insert smoothly.
It’s important you place the needle slowly, as the needle tip can be bent / damaged if it interferes with inner components during insertion.
Note: Sometimes the trigger can interfere during needle installation. Its best to install the needle by pressing downward on the trigger to ensure the needle makes it’s way through the trigger bore.
Once you feel the needle stop, do not keep pressing, its likely reached the nozzle. Continued hard pressure on the needle will split the nozzle. Requiring a nozzle replacement. Simpy seat the needle into the nozzle, and twist slightly.
Keep in mind airbrush parts are small and quite fragile.
Check Needle Seal and Lubrication requirements below↓
Needle Lubrication Requirements & Methods:
Lubrication Is Commonly Required Here. / Lubrication Is Not Commonly Required Here.
Parts To Lube:
- Lubricate The Needle: Lubricating the needle shaft will allow it to insert smoother during assembly.
Needle Seal Requirements & Methods:
A Seal / Sealant Is Not Commonly Required Here.
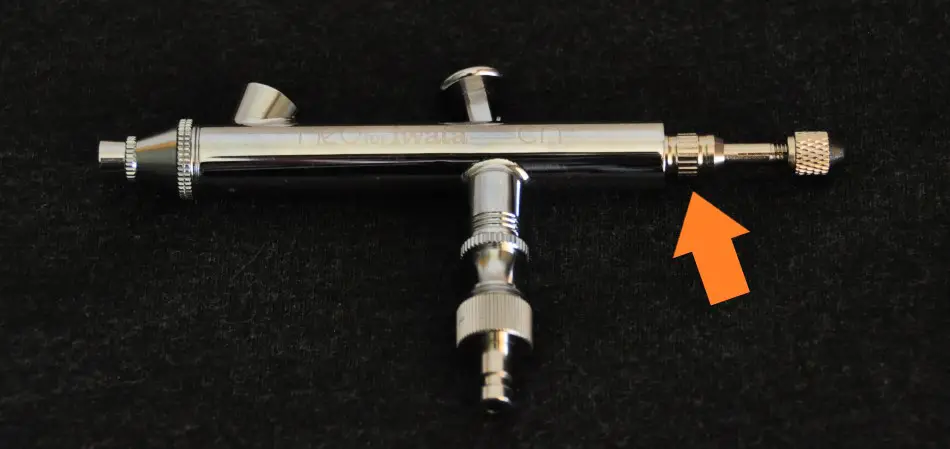
9: Tighten Needle Chucking Nut / Needle Lock Nut
Once the needle is properly seated, tighten the needle lock nut to lock the needle into the needle guide.
You’ll know the lock nut is tight enough when you pull back on the trigger and the needle tip moves inward. Or if the spacing between the lock nut and the tail of the needle stays the same as you pull back on the trigger.
Check Needle Lock Nut Seal and Lubrication requirements below↓
Needle Lock Nut Lubrication Requirements & Methods:
Lubrication Is Commonly Required Here.
Parts To Lube:
- Lubricate The Threads of the needle lock nut: By applying a small amount of Lube to the threads it reduces wear during the airbrush disassembly and re-assembly process.
Needle Lock Nut Seal Requirements & Methods:
A Seal / Sealant Is Not Commonly Required Here.
10: Install Handle
Now simply thread on the airbrush handle. Buy pay close attention to the gap between the handle and the airbrush body. If it starts to feel tight while there is still significant spacing between the airbrush body and handle odds are the inner tail of the handle is coming in contact with the needle.
If this is the case, re-adjust the needle and try it again. Again, airbrush parts are small and fragile, do not force anything.
Check Handle Seal and Lubrication requirements below↓

Handle Lubrication Requirements & Methods:
Lubrication Is Commonly Required Here.
Parts To Lube:
- Lubricate The Handle Threads: By applying a small amount of Lube to the threads it reduces wear during the airbrush disassembly and re-assembly process.
Handle Seal Requirements & Methods:
A Seal / Sealant Is Commonly Required Here. If the Handle has / had a seal on it, or feels sticky around the threads, odds are it needs to be sealed using either a factory replacement seal, or an alternative sealant listed at the top of this article. The “Iwata Neo” comes with a factory O’ring, which was in good condition, so I re-used it.
Always inspect your factory seals, If they are free from damage, you could try re-using them. As I did for the handle.
11: Install Paint Cup (If was removed)
For many, the paint cup is not removable. If that’s the case for you, your likely finished with the airbrush assembly process. But for some (Like I) the paint cup is removable
Simply thread on the paint cup by hand. But don’t go to tight as the threads will strip.
Check Paint Cup Seal and Lubrication requirements below↓
Paint Cup Lubrication Requirements & Methods:
Lubrication Is Commonly Required Here.
Parts To Lube:
- Lubricate The Paint Cup Threads: By applying a small amount of Lube to the threads it reduces wear during the airbrush disassembly and re-assembly process.
Paint Cup Seal Requirements & Methods:
A Seal / Sealant Is Commonly Required Here. If the Paint Cup has / had a seal on it, or feels sticky around the threads, odds are it needs to be sealed using either a factory replacement seal, or an alternative sealant listed at the top of this article. I’ll be re-using the factory O’ring on this “Iwata Neo”, as it’s in good shape.
Troubleshooting Your Airbrush
If your airbrush begins to act up after the assembly process, it may be one or multiple of the following issues:
A Good way to test most of the seals on your airbrush is to spray some soapy water (Using a spray bottle) over the exterior of the airbrush. If you notice any bubbles forming on the exterior, it’s a bad seal and will likely need replacing / re-application of sealant. Review my article on “Why bubbles are forming in the paint cup” for further detail on this issue. But odd’s are you’ll have to disassemble and re-seal / replace the seal on the nozzle.
A Good way to test the nozzle seal is to simply fill the paint cup with mildly soapy water, and spray it through the airbrush. If bubbles begin to from in the paint cup, odds are your nozzle seal is bad and will need replacing / re-application of sealant.
Conclusion
As the disassembly and assembly process can be intimidating
Even though the airbrush assembly process can be intimidating at the start, It does get easier once you understand the process, and how the airbrush works. Eventually the process will become second nature the more you disassemble and re-assemble your airbrush.
Below is each assembly step for quick referance:
- Install Nozzle
- Install Nozzle Cap
- Install Needle Cap
- Assemble Inner Cartridge
- Loosely Thread In Inner Cartridge
- Install Trigger
- Finish Threading Inner Cartridge
- Install Needle
- Tighten Needle Lock Nut
- Install Handle
- Install Paint Cup
Anyway, I hope you were able to find some value here! If you have any further questions regarding the airbrush do be sure to take a look around the website. Airbrush Insider is dedicated to helping all in the airbrush community!
This is Colt signing off!
Check Out Some Of My Favorite Airbrush Equipment:
- My Favorite Airbrush To Date!
- The Air Compressor I Currently Use, And Why I’m Never Going Back To A Traditional “Airbrush Compressor”!
- My All Time Favorite Airbrush Paint’s For Ease Of Use & Versatility!
Next Recommended Resources:
How To Thin Airbrush Paint (For Consistent & Reliable Paint Delivery)