An airbrush is a small handheld pneumatic tool used by artists and creators to atomize and apply various liquified media to a multitude of different surfaces.
Airbrushing is the act of using an airbrush in a strategic manner in order to illustrate the illusion of depth or contour upon a surface that naturally possesses little or no such qualities.
To begin your airbrush journey right, you should know your way around the airbrush. Mechanical knowledge of the airbrush will allow you to better use the airbrush to its fullest potential, as well as troubleshoot and repair it when trouble arises.
Table Of Contents: Have a preference as to where you’d like to start?
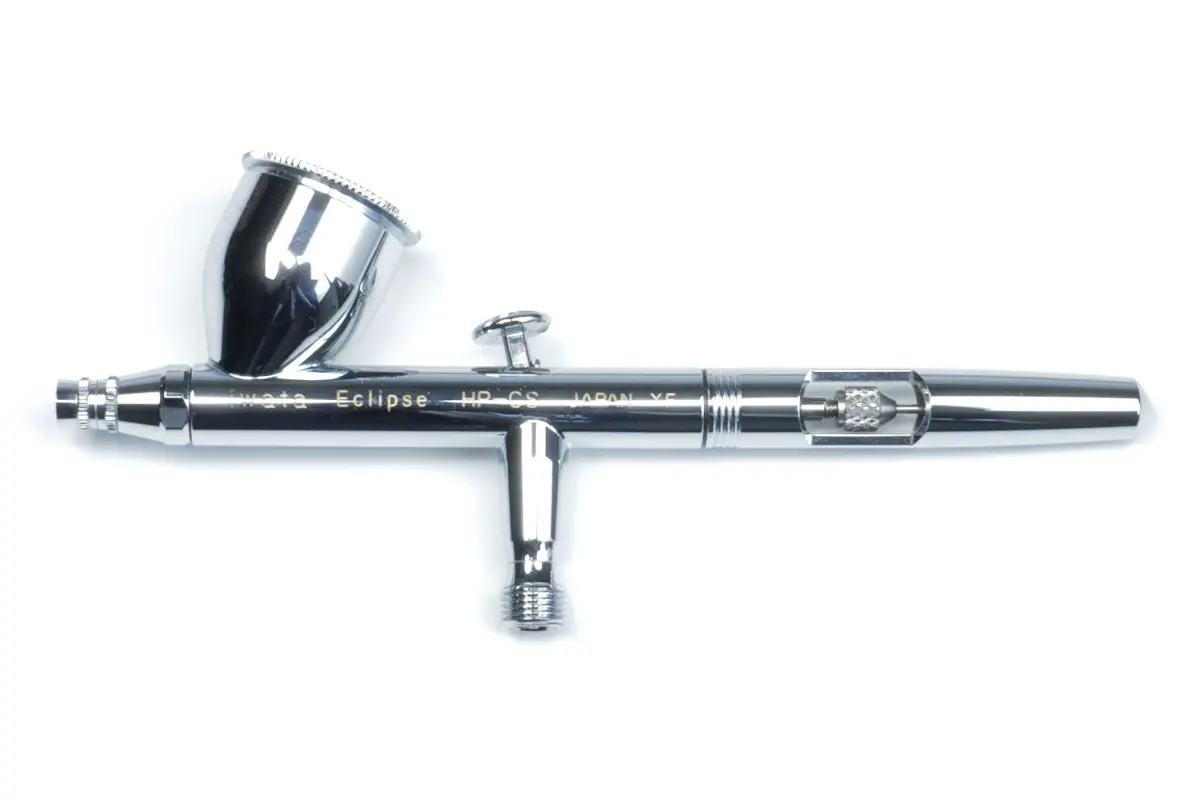
To begin, lets discuss the basic parts of an airbrush from tip to tail.
Parts Of An Airbrush
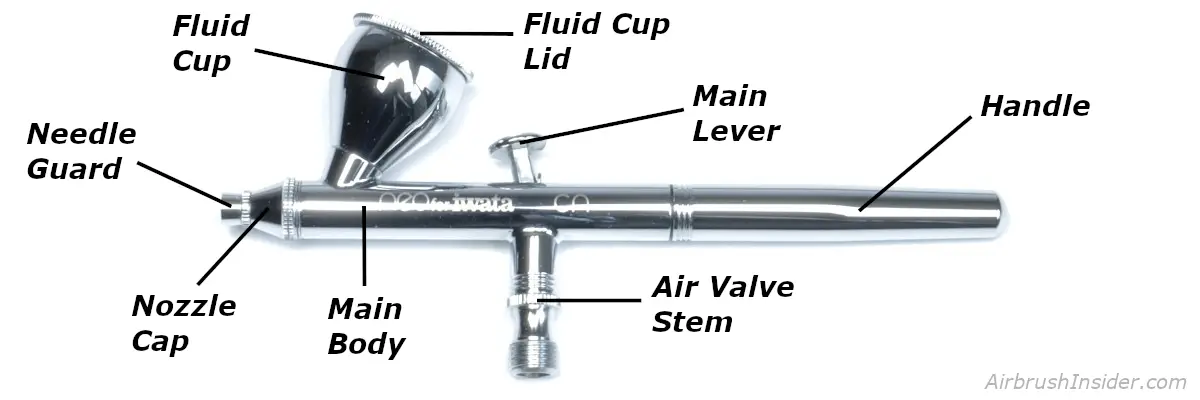
Click any one of the below corresponding hyperlinks to discover the function of that part. (If you have further questions, follow the link at the bottom of this sub-section to learn more about airbrush anatomy).
Needle Guard – Protects the tip of the needle & the nozzle from becoming bent or damaged. If such circumstances occur, the airbrush will not function properly if at all.
Nozzle Cap – Also known as the Air Cap, protects the nozzle, manages air flow, and in some cases is the mechanism that holds the nozzle in place.
Fluid Cup – Used to house and supply the liquified media of your choice to the airbrush during use. Can be a cup as seen in the image above, or a bottle as seen on a siphon feed airbrush.
Fluid Cup Lid – Used to both reduce spills, as well as keep your media liquid so it will flow through the airbrush with ease.
Main Lever – Otherwise known as a trigger. The main lever gives you control over the air and paint flow. Double action airbrush users press down on the lever for air and pull back for paint (The further back you pull the more paint you get). Single action airbrush users press down on the main lever and get paint and air flow simultaneously.
Main Body – Essentially the base of the entire airbrush, as all other airbrush parts connect to the body. The main body houses the fluid and air channels that guide and orient the media for best atomization.
Air Valve Stem- Houses the air valve. The air valve opens any time you press down on the Main Lever and closes when you let up. The base of the stem is where your air supply connects to the airbrush via your air line.
Handle – Allows the user greater surface area to hold onto when using the airbrush. Also protects the internals of the airbrush from potential damage. Though some users prefer to airbrush with the handle removed.
Airbrush Features To Consider
As with most goods and services, you have different options available to choose from. Airbrushes are no different.
Usually, you’ve got 5 major features to choose from when purchasing your airbrush, each with its own subset of options to pick from. They are as follows:

Click any one of the below corresponding hyperlinks to discover the options that got with the associated feature. (If you have further questions, follow the link at the bottom of this sub-section to learn more about the different airbrush types available to choose from).
Fluid Feed – This refers to the method at which the fluid (paint) is fed to the airbrush. Common options include: Gravity feed, Side feed and siphon feed. All three place the fluid cup at different points abord the airbrush.
Lever Action – This refers to the method at which the fluid and air flow are controlled via the user. Common options include: Double action airbrush & Single action airbrush. Double action allows for variable fluid flow rate on the fly, while single action is a constant flow rate.
Grip Style – This refers to the handle to which the user holds and operates the airbrush. Common options include: Traditional grip and pistol grip. Traditional grip is far more common than pistol grip, but the option is available on some airbrush models for those who desire it.
Mix Method – This refers to the point at which fluid and air mix in order to atomize the liquid media. Common options include: Internal mix & External mix. Traditionally external mix was the staple for the industry, but in the modern age, internal mix has become the norm.
Size Spec – This refers to the size of the components found within an airbrush such as, the airbrush needle, nozzle, and complete head assembly. Common options include (but are not limited to): Large (0.05mm), Medium (0.035mm) & Small (0.02mm). Traditionally the larger the size, the larger the spray pattern. The smaller the size, the smaller the spray pattern. Small is good for fine art and detail work, while large is good for color coverage or viscous liquids.
Internal Airbrush Function
An airbrush works by using air pressure to break up low viscosity liquified color into microscopic droplets. Essentially creating a controlled mist of airborne color.
This process is called atomization.
Atomization is the process of turning a liquid into a mist.

The internal main body of an airbrush consist of 2 tubular channels, one running internal of the other, both flowing in the same direction – toward the front/tip of the airbrush.
The internal tubular channel runs down the center of the airbrush and carries fluid media (paint), the outer tubular channel runs exterior to the internal channel and carries compressed air.
The tip of the Nozzle is where the magic happens. Both the inner and outer channels mix.
At this point is where the compressed air is doing its intended job. That is, pulling the paint from the inner chamber and atomizing it off the tip of the needle into thousands of microscopic particals.
To control when and how atomization occurs, the airbrush utilizes a tapered needle that runs internally down the center of the fluid channel.
At the tip of the needle, the inner walls of the nozzle and exterior wall of the tapered needle tip work together to seal fluid from coming in contact with the air flow until the user is ready for paint. (Similar to a mechanical cork)
Once ready, the user presses down on the lever for compressed air flow, then pulls back on the lever for paint flow.
By pulling back on the lever, this slides the needle toward the rear of the handle, essentially breaking the seal between the inner wall of the nozzle and exterior wall of the tapered needle tip.
The further backward the needle is pulled, the wider the opening becomes between the inner wall of the nozzle and the needle tip, resulting in a greater amount of atomized paint the user will receive to their artwork.
Applications Fit For Airbrush Use
The airbrush is great for creating depth in an image or on an object by utilizing gradients from light to dark, or blends from one color to another.
Though the airbrush can be used in many different and creative ways. It’s most sought after in the following endeavors:
Fine Art – Many in the world of murals, portraits and realism find themselves doing a lot of detail work with an airbrush in order to build up layers of color to create depth in a piece and make an artwork come to life.
Cosmetics – Many in the makeup, body paint, and tanning industries will utilize an airbrush for product application when smooth transitions or gradients are required. However, when working on human skin, it is vital you work with the correct products and air pressure. Incorrect product, or too high of air pressure can damage the skin and harm the applicant.
Hobby – Many in the miniatures and models space utilize an airbrush to create further depth and patina to a model, or to provide further color density. The overall goal in mind for most is to enhance the realism of the piece. To which the airbrush can make quick work of doing and provide a better end result then a brush could ever achieve.
Apparel – Many in the clothing & shoe industry utilize an airbrush to create one-off, designs on wearables for customers commonly visiting a specific geographical location, or names &/or messages based on the customers’ input.
Food – Many in culinary arts utilize an airbrush with edible coloring to further enhance, &/or add to the treats they are making for customers. Whether it’s a birthday, holiday celebration, or special event often times an airbrush will be used to further the design of the edibles.
Frequently Asked Airbrush Questions:
How much does airbrush equipment cost – Airbrush equipment can cost anywhere between $200 – $3,000 (USD). Even more depending on the requirements you have in mind. But for most single person setups you can expect to spend $400 (USD) total on a decent airbrush, quality air compressor and a basic air line setup. Along with the miscellaneous items such as paints, reducers, cleaners and tools. – For a detailed airbrush equipment price breakdown, see my post on Airbrush Equipment Cost.
Is airbrushing difficult to learn – Airbrushing is a skill that can be developed with practice and persistence. Assuming you have a basic understanding of art theory, airbrushing is not difficult to learn its more about muscle memory & skill development then it is academic. – Learn more about the difficulty of learning to airbrush.
What are the advantages of using an airbrush – Likely the most significant advantage to using an airbrush over other artistic tools is its ability to achieve smooth gradations and transitions such as shadows and color blends. – To learn more of the advantages and disadvantages of using an airbrush see my related post here.
How do I choose an airbrush – In order to choose the right airbrush for you and your needs it is important you know of each individual feature available to you and the corresponding options that go along with each. Once you know of your options, it is important you understand the advantages and disadvantages to each so you can choose those that will benefit you the most and avoid those that don’t. – For further assistance on choosing the right airbrush for you, check out my Airbrush Selection Tool.
Conclusion
The airbrush is made up of many different parts to which each has its own part to play in making an airbrush function as designed. By knowing each part and understanding the failure points of each can greatly aid you in locating and fixing problems when they arise.
Knowing the parts of an airbrush and how an airbrush works will greatly benefit you when problems present themselves, as problems are an inevitable part of airbrushing. Not to mention knowing your way around the airbrush will greatly improve your cleaning system when it comes time clean it and prep for next times session.
All said,
I hope you were able to find some value here. If you have any further questions, please see the navigation links below.
This is Colt signing off!