There are a multitude of different reasons as to why one may find themselves needing to remove or simply change their airbrush needle &/or nozzle… Today I will be walking you through the best methods to do exactly that.
But first, a few Reasons why someone would want to, or need to change an airbrush nozzle or needle:
- Damaged / Bent needle
- Damaged Nozzle
- Upsize or downsize the needle & nozzle size… (Ex: going from a 0.2mm needle & nozzle to a 0.5mm)
Truly, the reasons for replacing or simply removing an airbrush needle and nozzle surpass this list, anything from a damaged needle and / or nozzle to simply common wear and tear that occurs over time. As well, of course, simply cleaning the airbrush…
If you have been airbrushing for some time now. Odds are you have likely damaged your airbrush needle, nozzle, or both (I mean why else would you be reading this)… If so, don’t stress. This happens all the time, even to some of the best airbrush artists in the world.
Follow along with me as we go through the proper steps required so that no damage occurs to the airbrush internals.
Changing An Airbrush Needle &/or Nozzle
For the most part changing an airbrush needle and nozzle it’s quite simple. I mean, if you know how to take apart your specific airbrush then odds are it will be a walk in the park (so to say) to change out your airbrush components.
Below we will be going through the steps necessary to correctly replace your current needle and / or nozzle. But do keep in mind, the steps are very close to the same when it comes to replacing either your airbrush needle or the nozzle alone. If you only need to replace one or the other then the steps necessary will be close to the same. The only difference is you will not replace the opposite of what you intend to replace.
On that same note, it is important that you ensure both the nozzle size and the needle size matchup. This means, for instance, if your airbrush currently is equipped with a 0.35Mm nozzle and a 0.35Mm needle (to which needs to be replaced).
Then ensure both the replacement nozzle and needle are both the same in terms of size.
It is important that you pair the nozzle with the same size needle, otherwise you could end up with damaged components, and an improperly working airbrush. For example, do not pair a needle that is, say, a 2.0Mm with a nozzle that is 0.5Mm. This sizing difference will not allow for a proper seal between the airbrush nozzle and the needle tip.
I understand I rambled there quite a bit. However it is highly important that you pair the same size nozzle and needle. Even a small difference in size between the two can result in an improper spray pattern, and or potential damage to the new components.
It is very important to note, there are a multitude of different airbrush options available on today’s market. Given this fact, it is quite possible that your airbrush may require subtle differences in the following steps in order to properly change / replace your airbrush nozzle and needle.
However, across-the-board it is typically quite similar no matter the brand or style of airbrush you are using. That is, as long as you are using a modern airbrush.
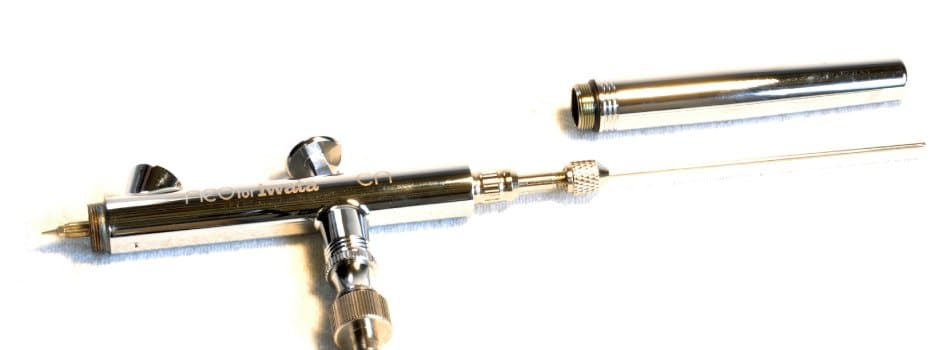
1: Unscrew / Remove The Tale Casing Of The Airbrush
This will give you access to the needle locking chuck to which will be loosened later when it comes time to remove the needle. But for now, you simply need to gain access to it by removing the casing that protects it during use.
2: Unscrew / Remove The Needle Crown & Nozzle Cap Located At The Nose Of The Airbrush
This will give you access to the tip of the needle, but more importantly, the nozzle. Later you will remove the nozzle (if need be) but for now simply inspect the needle tip, and the nozzle.
3: Loosen The Needle Lock Chuck Near The Tale Of The Needle
Located near the tale end of the needle (while its still in the airbrush) you will notice a small chuck. Loosen it slightly.
Note, you don’t need to remove it completely, Just loosen it.
This will free up the needle, and allow you to pull the needle out of the airbrush cavity. But before pulling the needle from the airbrush be sure to check with step 4 below.
4: Inspect Needle Tip (Determine Nozzle & Needle Removal Strategy)
Most remove the needle by pulling it (At the tale end) through and out the tail end of your brush. But this can damage the airbrush if damage has occurred to the tip of the needle (Bent needle).
It is very important that you inspect the tip of the needle before pulling it through the airbrush. This is because, if you have a bent needle it can cause damage to the nozzle as well as the internals of the airbrush.
You see, by pulling a bent or damaged needle through the nozzle you can flare out the nozzle opening and damage the nozzle. Plus, as the bent needle slides through the internals of the airbrush it can snag and tear any O-rings, gaskets, and so forth, That is placed inside the airbrush for sealing purposes. (A torn seal is no longer going to seal…)
If this is to occur, it’s likely you’re going to have to replace much more than just simply the airbrush nozzle or needle.
Now that you understand why you need to inspect the tip of the needle as well as the nozzle. At this point I simply want you to determine the damage that has occurred to the nozzle or needle and follow either of the following steps below (4.1, 4.2, Or 4.3) That apply to your situation.
4.1: Removal Strategy 1) If Needle Tip Is Straight & Nozzle Is Free From Damage:
If your current needle and nozzle is free from any damage that could potentially damage other components then follow the following steps:
- Loosen the needle locking chuck (If not done in step 3) located at the tale end of the airbrush.
- Slowly remove the needle by pulling the tale of the needle through and out the tale of the airbrush. (if you feel any sudden unusual resistance, stop and resort to step 4.3 below.)
- Remove the airbrush nozzle by either unscrewing it, or pulling it off (Depends on manufactured method)
Now you should have both your airbrush needle and nozzle removed and ready for replacement. Next move on to step 5
4.2: Removal Strategy 2) If Needle Tip Is Bent & Nozzle Is Free From Damage
The most common reason as to why one may need to change or replace an airbrush needle is because damage has likely occurred (the needle tip has been bent). If this is the case for you it is very important that you do not remove the needle by pulling it from behind, through and out the tail end of the airbrush. As this can cause damage to the internals.
Rather, follow the following steps:
- Using a pair of flat mouth pliers, do the best you can to straighten the tip of the needle without damaging the nozzle.
- Unscrew the airbrush nozzle, and slide it off the tip of the nozzle.
- Loosen the locking chuck at the tale of the airbrush (If not done in step 3) and push the needle through & out the front (nose) of the airbrush. This will prevent the bent needle tip from potentially snagging the internals of the airbrush and causing damage. Be careful of the sharp needle tip.
At this point you should have the airbrush nozzle and needle removed, and ready to move on to step 5. But before you do, It’s possible your needle could be straightened and reused. To save you some money on replacement needles I have created a resource that can help you to do just that, straighten out your bent airbrush needle and save you money on replacements. It can be found Here: How to fix a bent airbrush needle…
4.3: Removal Strategy 3) If Needle Tip Is Bent & Nozzle Is Damaged
Sometimes the damage to a needle can be so bad that it also damaged the nozzle as well. If this is the case for you, lets go over how to properly and safely remove both without damaging your airbrush any more.
- Begin by loosening the airbrush needle locking chuck (If not done in step 3)
- loosen the nozzle so it is free from the housing of the airbrush. (Its likely damage to the needle is so bad that you can’t get the nozzle to slide off… If so, continue on)
- Push the airbrush needle from the tale, through and out the front (nose) of the airbrush. (with the nozzle resting on the tip of the needle & Removed from the airbrush itself)
At this point both the needle and nozzle should be removed, and you should be ready for step 5. But before moving on, You may be able to save your current needle, and maybe your nozzle. To find out how check out my latest post on the topic Here: How to straighten a bent airbrush needle…
5: Install New Nozzle (Carefully)
Before inserting the new needle and nozzle be sure to check the internal components and ensure no damage has occurred over the duration of time the airbrush was in use.
Also, if your airbrush is in need of any cleaning now is the time to do it, as it is not ideal to disassemble an airbrush to this extent on a regular basis. For a complete guide on deep cleaning an airbrush be sure to check out my latest post on the topic. It’s titled, how to clean an airbrush!
That being said let’s move on to inserting the New Nozzle or Re-Used Nozzle if the current one was in good shape.
- Begin by inspecting the nozzle and needle for any damage or imperfections. As well, ensure the nozzle has the necessary O ring / Seals (if your airbrush requires either)
- Ensuring the airbrush is properly assembled up until this point, then simply thread on, or place the airbrush nozzle in it’s correct placement (at the nose of the airbrush). Be sure not to over tighten the nozzle as a can share off. Ideally it is best to go until the nozzle is snug with the airbrush housing, but no more.
Important, Careful not to over tighten nozzle as the threads can shear off (That is if your nozzle threads on)
6: Insert New Needle Through The Tail End Of The Airbrush (Carefully)
It is very important that you take extra precautions when working with the airbrush needle, as it is very thin and can easily be bent.
- Carefully slide the needle tip into the tale end of the airbrush (at the needle locking chuck) and through the internal cavity of the airbrush until the tip of the needle exits the nozzle at the nose of the airbrush. Important: If you feel any sudden resistance then stop and reassess the needle passage way (otherwise you could bend the new needle). Sometimes the airbrush trigger can get in the way when inserting the needle. If this is the case then re-adjust the trigger and try again. Once the needle reaches the nozzle, do not force the needle into the nozzle. Stop once you feel the needle tip seat into the nozzle. Otherwise you could damage the nozzle, needle, or both.
- Tighten up the needle locking chuck and begin reassembling the airbrush. (careful not to over tighten the needle locking chuck as it could strip if over tightened.)
7: Finish Re-Assembling The Rest Of The Airbrush
When reassembling the airbrush it is important you take extra caution when working around the nozzle and needle tip. As these components are very fragile as well as very sharp.
Note: when re-installing the Nozzle cap, and Nozzle crown / Needle guard it is best to pullback on the trigger. By doing so, you will retract the needle tip into the nozzle (Assuming your using a double action airbrush), to which will protect the needle tip from becoming damaged. As well, it will protect your fingers from the sharp needle…
Also ensure all seals are in good condition during the assembly process, otherwise its best to replace them.
- Re-install the airbrush Nozzle cap
- Re Install the airbrush Nozzle crown / Needle guard
- Re Install the rear needle casing (located at the tail end of the airbrush)
- Test the airbrush using distilled water to ensure it is operating properly
Conclusion
In final, the process of removing or replacing an airbrush nozzle and/or needle is quite simple. However, depending on the circumstances that have sparked your need to change or replace your airbrush nozzle and/or needle, You may or may not need to take specific precautions when disassembling the airbrush.
Specifically, when you have bent the needle. Disassembly must be done in a specific way other wise you could end up causing further damage to the inner components of the airbrush.
It is also important that I note, damage is not the only cause for one to want to, or need to, replace the nozzle and / or needle. As some airbrushes come equipped with different size needles and nozzles to which can be paired with one another and swapped.
For example, the master airbrush comes equipped with three different nozzle and needle sizes (0.2mm, 0.3mm, & 0.5mm). To which can be interchanged. However, with a setup as such. You must ensure the same size needle is being paired with the same size nozzle. Otherwise you could end up with damage to one or the other. Or, of course, and improperly functioning airbrush…
That being said, I hope you were able to find some value here! If you have any further questions regarding the airbrush do be sure to take a look around the website. Airbrush Insider is dedicated to helping all in the airbrush community!
This is Colt signing off!
Check Out Some Of My Favorite Airbrush Equipment: