Learning how to properly hold an airbrush can mean the difference between finding complete control over your airbrush and not…
If you’re anything like me, odds are you’ll take any advantage you can get to make your artwork as attractive as possible. By simply utilizing the proper form when holding an airbrush you can significantly improve your control over the airbrush, in turn, making your artwork stand out amongst many!
So today we will be diving deep into how to properly hold an airbrush for fine and precision control.
The Importance Of Proper Form
When it comes to using an airbrush, the way at which you hold the airbrush is vitally important. That is, if you intend on reaching the levels you so desire.
You see, improper form can result in limited control over your airbrush, as well as cramping, twitching, and fatigue of the hand, wrist and fingers over time.
It is important that you hold the airbrush in a way that is satisfying, and comfortable to you for a significant period of time. Because, let’s be real, it’s going to be very difficult to airbrush for any substantial period of time if every 20 minutes your hand is cramping…
Eventually you’re going to get so frustrated you give up airbrushing all together…
Even the best airbrush artist struggle with cramping, and fatiguing every now and then. But a trick used by many is to get into the habit of monitoring the way the hand feels at all times, as well as, reminding themselves to relax.
Beginner airbrush artists especially, struggle to remind themselves to relax their hands. The result… Their motor skills slowly begin to fade, and it appears as if the longer they spend airbrushing, the worse their control over the airbrush becomes.
When I began to learn the ways of the airbrush, I found this happening all the time, but didn’t understand what was going on because my focus was on so many different things… Turns out, I needed to focus on relaxing my hand, as well as the overall comfort of my hand…
I want you to remember this: comfort comes before control, simply because control cannot be had if comfort is lacking… Select a method to hold your airbrush that best suits your comfort level, then begin to modify it for best control over the airbrush.
If your not comfortable, it’s going to be very difficult to control the airbrush for any substantial amount of time.
Methods To Hold An Airbrush
As you will notice below. There are a few options to choose from when it comes to hold an airbrush. For the most part, each method closely mimics the others. However there are a few methods that are substantially different.
Disclaimer: I personally use 2 of the methods listed below. The other methods were sourced from the experience of other artists in the airbrush industry and what feels comfortable for them… I wasn’t only going to give you my methods, though they are commonly used…. My goal here is to provide you with some variety! But do note, there are other methods out there that are not listed here. Just these are the most commonly used
Anyway, enough of me blabbing… Let’s get started!
Now, you likely have noticed, an airbrush is shaped similarly to a pen or pencil (at least most airbrushes are). This is because it was designed to be held in a similar way… However, of course, given the factors required in order to operate the airbrush minor adjustments had to be made…
Check out the short video below, where I explain the methods I personally use to hold my airbrush!
Continue on for further explanation, along with a couple other methods not mentioned in the video.
Method 1
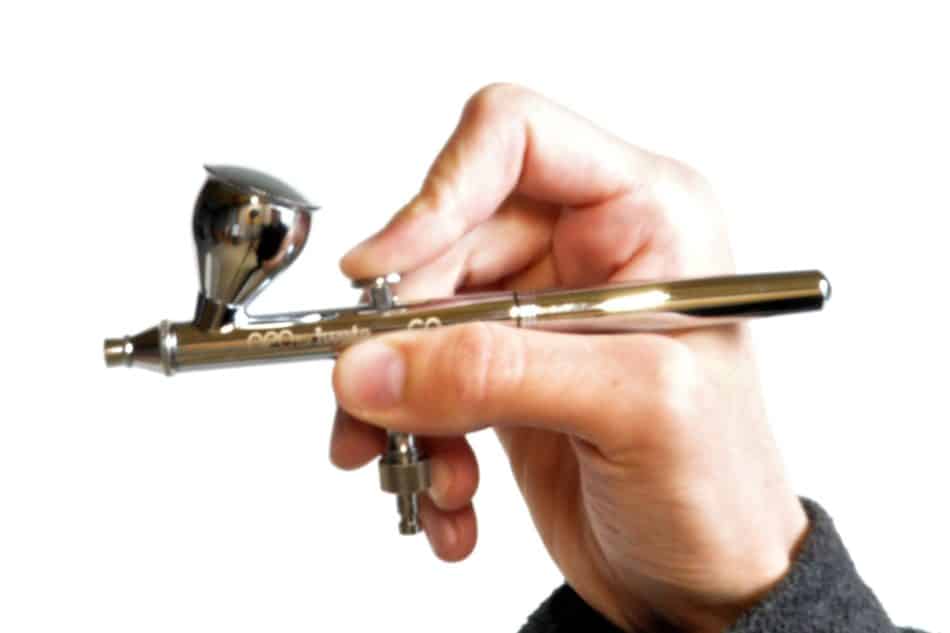
Concave “A”

Notice in the image above, the pointer finger is shaped in sort of a concave “A” shape, hence the name: “Concave A”. The concave shape of the pointer finger allows for better control over the airbrush trigger when pulling back on the trigger for paint (Double actioning), when compared the next method “Convex A”.
By making your pointer finger appear concave over the airbrush trigger, you utilize the stronger joint on the finger for better control when applying paint. Allowing for better stability when pulling the trigger back for paint.
You apply paint by pulling the last 3rd of the pointer finger in toward the hand, pivoting at the large joint. Similarly to how an accordion works.
I personally utilize this method and have found it to work well in specific instances.
Convex “A”
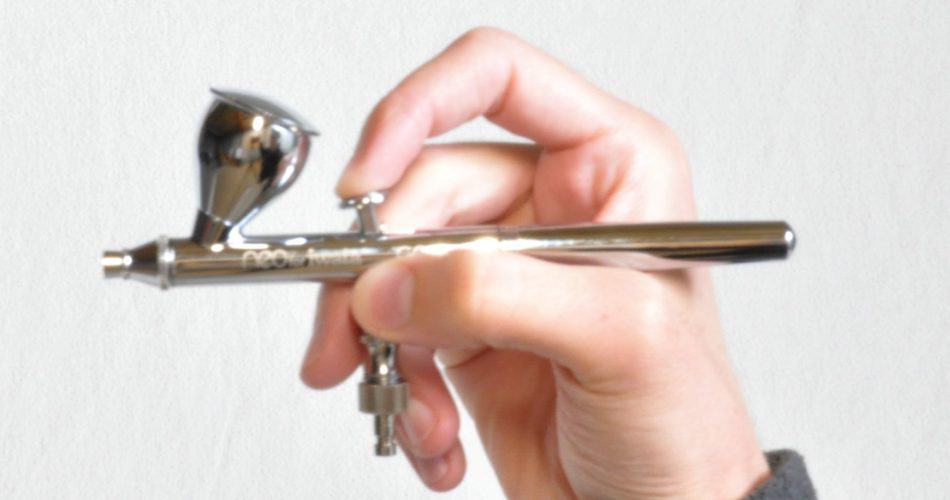
I strongly recommend avoiding this option if your using a double action airbrush.
Notice in the example image above, all the fingers and hand positioning is near to the same as the above method (Concave “A”), except for the pointer finger. In this case, the pointer finger makes more of a convex “A” shape, rather than a concave shape.
Now, this method is not recommended for the double action airbrush users simply because it provides very limited control over the airbrush when pulling back on the trigger for paint. Given you’ll be utilizing the weaker joint of the pointer finger for paint delivery.
Nonetheless, it allows for great control when pressing down on the trigger, which is commonly how a single action airbrush applies paint / medium.
If your finger is convex you may find its harder to control those subtle back and forth movements of the airbrush trigger (when operating a double action airbrush). Especially when working up close to the canvas, where micro movements of the trigger are vital.
- If your using a single action airbrush, I’d recommend the convex “A” to start.
- If your using a double action, I’d suggest avoiding this one and trying the concave “A” method listed above.
Method 2
“L” Shape
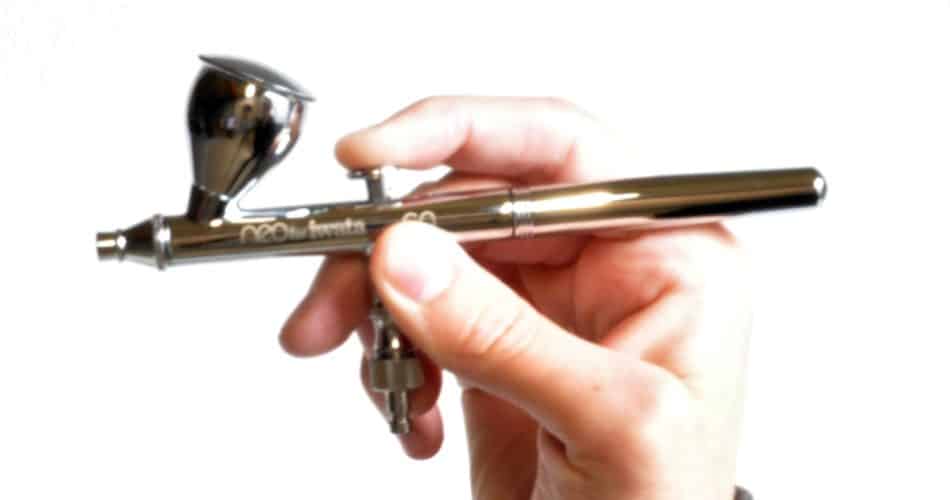
When compared to the method above, this method basically pulls the wrist down slightly, and a-lines the backside of the hand with the forearm (Straightening out the wrist). It also straightens out the pointer finger more into an “L” shape rather than an “A”.
You control the airbrush by slightly pulling the entire finger back. This method allows for good comfort, as well as good control over paint delivery.
However, for slightly better control over paint delivery, take a look at the variant of this method below!
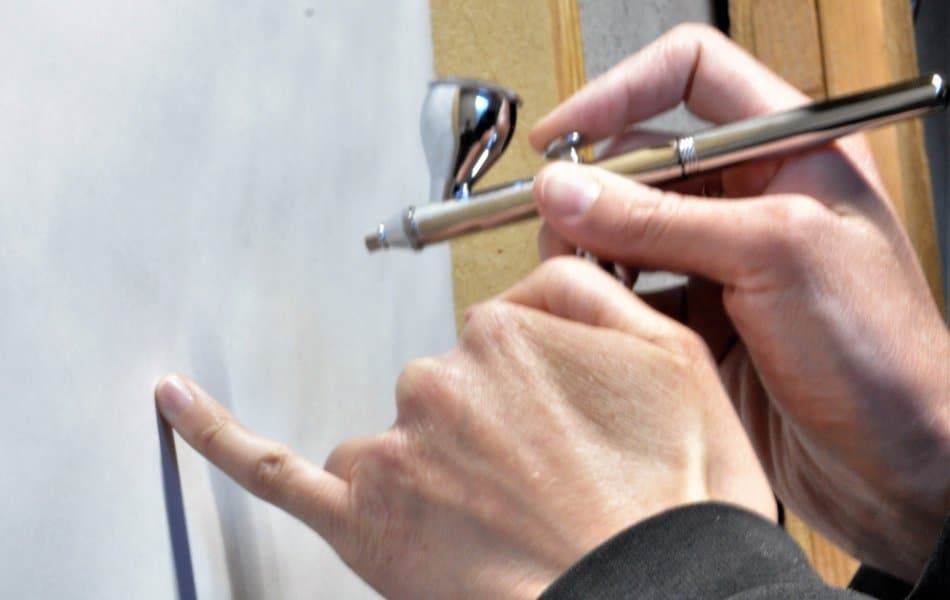
“L” Shape Overlap
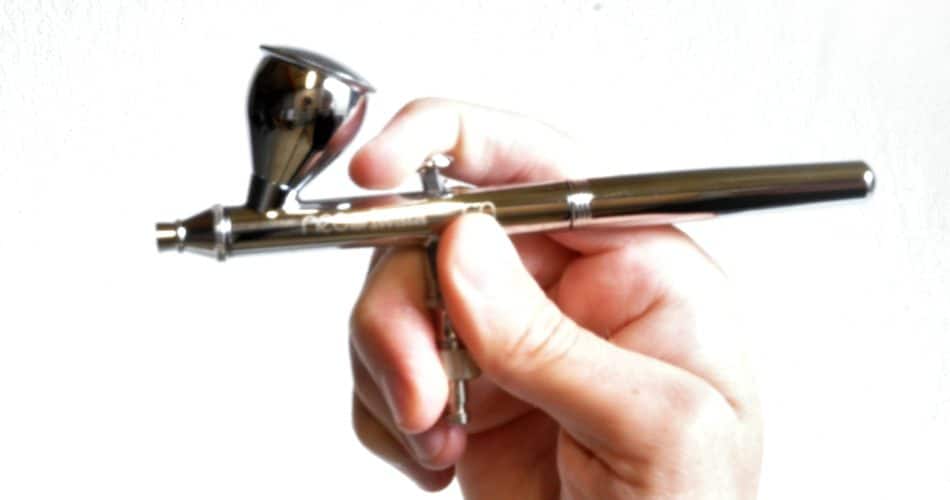
This option can be difficult to utilize when using a gravity feed airbrush, simply because the paint cup gets in the way as you can see in the image above.
However, this option (for many) allows for the utmost precise control over the airbrush.
Instead of pulling back on the airbrush trigger for paint utilizing the entire muscular structure of the pointer finger. This method simply requires a minor flex of the tip of the pointer finger to for paint delivery.
By using such a minor amount of movement (flexing the tip of the pointer finger), you will be able to control the paint flow precisely to the desired amount, with a little bit of practice.
As well, given the minimal movement to operate the airbrush, you will be able to airbrush for a substantially longer period of time before your hand and fingers begin to cramp, and fatigue.
I personally use this method for a majority of the time I spend airbrushing.
Method 3: Using Your Thumb
Now it’s not very common, but every now and then its likely you’ll see someone utilizing their thumb to operate the airbrush. That is, if you get the opportunity to watch others work.
But I thought i’d throw it in the lineup of methods here just to prove to you, there isn’t one specific way to hold the airbrush that is best for all.
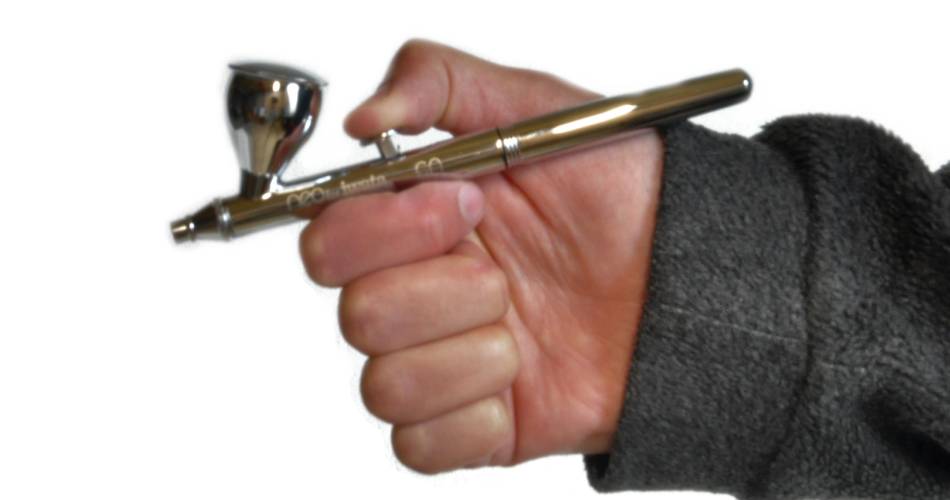
The method in the image above, as well as other closely related methods are used by a minority, but that does not mean you can get very precise control over the airbrush with these methods.
Simply put, you’ll wrap all 4 fingers (Of your dominant hand) around the valve shaft & air hose of the airbrush. Placing your thumb on the trigger.
You operate the trigger solely with the thumb.
I personally find it to be difficult to operate an airbrush in this manor. But that doesn’t mean it’s not a viable option for you.
The Best Way To Hold An Airbrush
The best way to hold an airbrush is the way that is most comfortable to you, and allows you the greatest amount of control over the airbrush.
Just like how we all have different taste preferences when it comes to food selection. We all have different hand gestures that are more comfortable than others.
My suggestion would be to test the methods listed above to find which feels most comfortable to you. Then if need be, modify it to your liking.
Oh, and it’s okay to utilize a few methods for holding the airbrush!
I personally use method 1: Concave “A” when airbrushing anything that is placed at shoulder height or lower, and Method 2: “L” shape overlap when airbrushing at shoulder height or above.
So take what feels best to you, and run with it!
Stabilize Using Your Off Hand
Given that an airbrush is operated above the surface being painted, It can be very difficult to stabilise the airbrush for precise control.
That is where your off hand comes into play!
Now there is a multitude of different ways to utilize your off hand for stability purposes. Below are just a few examples of how I go about using my off hand for stabilization.
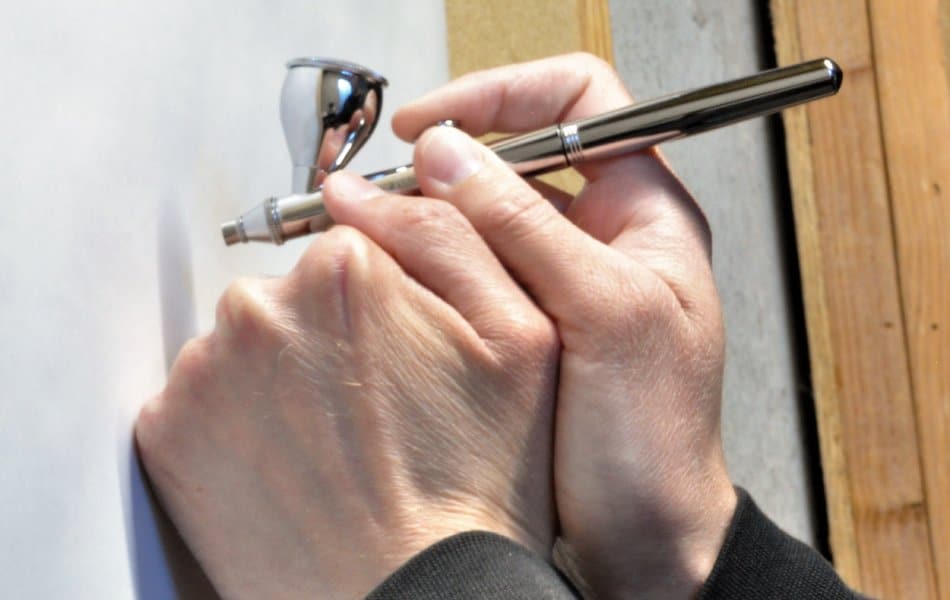
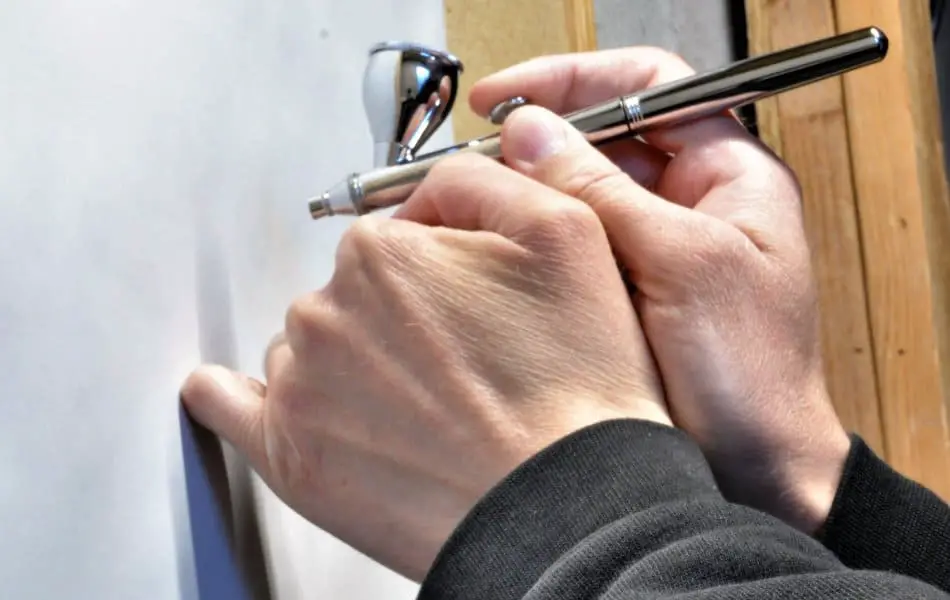
I personally like to rest my dominant hand (Hand holding the airbrush) on my off hand as it is in a fist. Although sometimes I’ll use my pink to allow for better pivoting.
My suggestion would be to do what feels best to you. There is just so much variety when it comes to stabilizing the airbrush using you off hand, that there just isn’t enough space here to provide examples…
Steps For Proper Airbrush Control
After learning how to hold the airbrush. Next, in line is learning how to properly operate the airbrush. Now, given there are 2 major options when it comes to airbrushes:
Each are operated in a slightly different way.
The Double Action airbrush is best operated in the following sequence:
- Press Down For Air
- Pull Back For Paint
- Let Forward (Stop Paint)
- Release (Stop Air)
Any time you begin painting you should start with the air on (Pressing down on the trigger), then pull back for paint.
While painting you should maintain a constant flow of air. Refrain from using the double action airbrush similarly to how you would use a spray paint can.
When finished painting, you’ll want to allow the trigger forward to shut off the paint, then release pressure on the trigger (shutting off the air).
By starting to paint with the air flowing , and finishing with the air flowing. You will reduce the amount of “Tip Dry” that builds up on the airbrush needle tip. Actually, proper sequencing of the airbrush as described can help substantially to reduce tip dry
The Single Action airbrush is best operated in the same manner you would operate a can of spray paint.
- Press down for both Paint & Air
- Release to stop Paint & Air
Simple!
For a complete rundown on how to properly control your airbrush, take a look at my latest post on the topic titled “How to control an airbrush“.
Conclusion
If you are new to airbrushing, you will likely notice just how precise you need to be with the airbrush trigger in order to achive great detail.
When using an airbrush, detail is achieved at a much closer distance to the canvas then other airbrush effects. And the closer you get the the canvas the more precise you need to be with trigger control.
Meaning, minor movements of the trigger can go along way when working in close proximity to the surface being painted. Limited trigger control can result in “Spidering“, which occurred when you apply too much paint at close proximity to the surface.
So if you intend on doing any detail work, your gonna need to get very precise micro movements of the trigger. My suggestion would be to test the methods above and decide which gives you the most comfort, along with control over the airbrush trigger!
Remember the following:
- Comfort comes before control
- Constantly monitor the way in which your hand feels when airbrush. A cramped hand will become fatigues and less reliable unless addressed.
- Remind yourself constantly to relax your hand. (It can be easy to loose focus on the way you feel, and focus in on the artwork itself)
- Testing is the name of the game, try different ways of holding the airbrush to find what works best for you.
Over my time spent airbrushing, I have come the learn, the less movement you demand from the hands and fingers when operating the airbrush, the longer you will be able to operate the airbrush for before experiencing discomfort and fatigue.
Anyway, I hope you were able to find some value here! If you have any further questions regarding the airbrush do be sure to take a look around the website. Airbrush Insider is dedicated to helping all in the airbrush community!
This is Colt signing off!
Check Out Some Of My Favorite Airbrush Equipment: