Airbrush paint is formulated to flow smoothly through the fine nozzle of an airbrush, which means it’s typically thinner and more fluid than standard acrylic paint. But what if you want to use that same paint with a regular brush? Whether you’re just getting started in miniature painting, experimenting with different tools, or simply ran out of your favorite brush-on acrylic, it’s a common question with a surprisingly practical answer.
This guide is for hobbyists, model builders, and artists who are curious about crossing over between brush and airbrush techniques. We’ll dive into whether it’s safe or effective to use a brush with airbrush paint, what kind of results to expect, and how to adjust your technique accordingly.
You’ll get community insights, visual comparisons, and real-world tips that go beyond theory—because sometimes the best solutions come from doing things a little differently.
❓Is It Okay To Use A Brush With Airbrush Paint?
Community-tested answers + brand-specific quirks
Yes — you absolutely can use a brush with airbrush paint. While these paints are designed for use in an airbrush (and thus much thinner than traditional acrylics), they’re still made from the same core pigments and binders found in brush paints. That means they remain fully compatible with hand application.
The main caveat is that because airbrush paint is pre-thinned, it won’t offer the same one-coat coverage you might expect from a thicker brush paint. You’ll often need two, three, or even four thin coats to build up solid opacity. On the flip side, the thinness of airbrush paint can be a surprising advantage when working with glazes, transitions, or subtle blends.
Painters across forums like Reddit, Bolter and Chainsword, and ModelShipWorld consistently report that airbrush paint performs well when brushed — especially for detail work or when correcting small errors.
It’s also a great fallback option if your go-to brush paint has dried up or you’re looking for a smoother finish with less brush drag.
Real User Insight:
“I use Citadel Air with a brush all the time — just takes more coats.” — Reddit user, r/minipainting
💧 Understanding Airbrush Paint Consistency For Brush Use
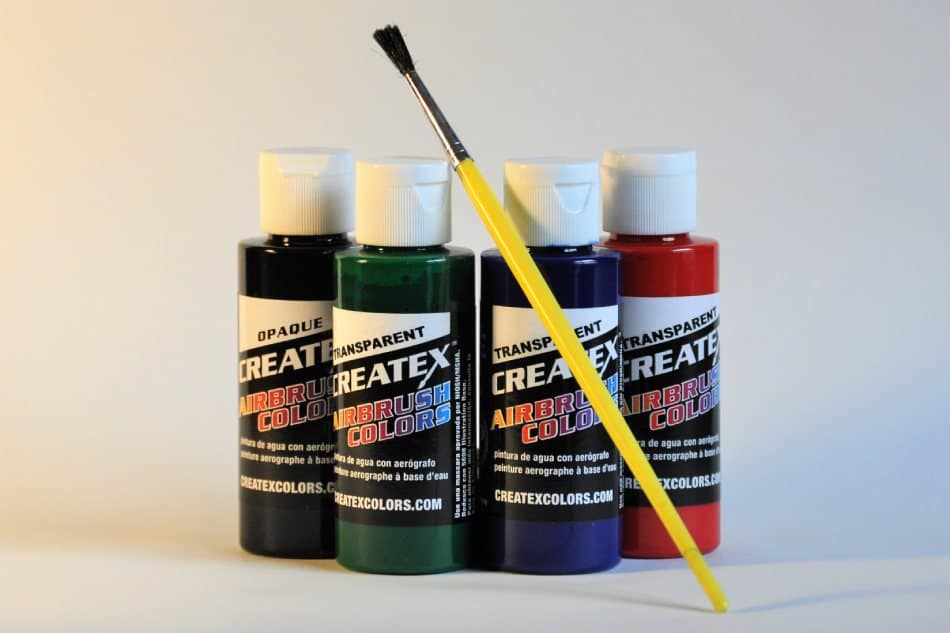
One of the most important things to understand when using a brush with airbrush paint is how different the consistency is compared to traditional acrylics. Airbrush paints—like Vallejo Model Air, Citadel Air, and Army Painter Air—are pre-thinned right out of the bottle. This allows them to atomize easily through an airbrush, but it also means they behave differently when applied by hand.
Because of this thinner consistency, airbrush paints tend to glide onto the surface with very little resistance. This is great for smooth transitions and layering, but it also means you’ll rarely get solid coverage in just one coat. Expect to apply two, three, or even four thin layers for full opacity—especially over dark primers or contrasting base colors.
Some artists adapt to this by slightly thickening their airbrush paint using matte medium or by letting a few drops dry slightly on a wet palette. Others embrace the flowy nature of airbrush paint to create glazes, filters, or subtle highlights.
Brand-specific differences also matter:
- Vallejo Model Air is excellent for brushing thin coats with minimal streaking.
- Citadel Air tends to pool more easily but lays down smooth if layered patiently.
- Army Painter Air works well for edge highlights but may require more layers for solid fills.
Understanding these subtle differences will help you control coverage, finish, and drying time more effectively.
🆚 Side-By-Side Comparisons
Seeing the difference between regular acrylic paints and airbrush paints (when used with a brush) can help set realistic expectations. Below is a quick comparison to illustrate how they perform in common painting scenarios:
| Attribute | Regular Acrylic | Airbrush Paint (Brushed) |
|---|---|---|
| Coverage | High (1–2 coats) | Lower (2–4 coats) |
| Flow | Moderate to Thick | Very fluid and smooth |
| Brush Strokes | Sometimes visible | More prone unless layered |
| Opacity | Strong with single pass | Buildable with layering |
| Dry Time | Moderate to slow | Fast |
| Detail Handling | Depends on brush & paint | Excellent for precise work |
| Glazing Potential | Requires thinning | Ideal straight from the bottle |
This comparison shows that while airbrush paints may require more effort to build coverage, they offer great control for detail and layering—especially when used strategically within a larger painting workflow.
🛠️ When To Brush Airbrush Paint
There’s a time and place for brushing airbrush paint—and knowing when to use it (and when not to) can make all the difference in your workflow.
Here are a few ideal situations where brushing airbrush paint makes sense:
- Edge Highlighting: Its thin consistency makes it great for subtle highlights and fine line work without clumping.
- Small Detail Work: Need to paint small icons, eyes, or trim? The fluidity of airbrush paint gives more control when precision is key.
- Color Corrections: If you made a mistake with your airbrush, brushing on the same paint keeps color matching seamless.
- Glazing and Transitions: The already-thin nature of the paint lends itself beautifully to glazes, filters, or smooth tonal shifts.
On the flip side, when might you not want to use it?
- Base Coating: You’ll often get better coverage and speed using standard acrylics or a properly set-up airbrush.
- One-Coat Coverage Needs: If you want full opacity quickly, brush-specific paints will outperform.
- Highly Absorbent Surfaces: Airbrush paints may soak in or bleed more than thicker paints, requiring more layering.
Blended Workflows Tip: Many miniature painters use an airbrush for base layers and backgrounds, then switch to brushed airbrush paints for refined details. It’s a versatile combo that can bring the best of both worlds.
🖌️ Application Techniques
When using airbrush paint with a brush, success comes down to adjusting your expectations—and your technique.
Here are several proven tips to get the best results:
🔄 Layering With Thin Coats
Because airbrush paint is so fluid, it’s best applied in thin layers. Load your brush lightly and apply smooth, even strokes. Let each coat dry fully before adding another. This avoids puddling and patchiness.
🎯 Brush Control And Consistency
Use fine-tipped brushes (e.g., size 0 to 2 round) with a good spring. Synthetic bristles often handle thin paint better, reducing the chance of the paint flooding the model. Work with the flow of the paint, not against it—gliding it rather than scrubbing.
⏱️ Working Time And Drying Tips
Airbrush paints dry fast. To extend working time, especially in dry climates, use a wet palette or add a touch of retarder/flow improver. For delicate blends, work in smaller sections and re-wet the surface as needed.
✨ Highlighting And Blending Techniques
Because they’re thin, airbrush paints are ideal for smooth blends and edge highlights. You can layer them gradually to build a highlight or glaze color transitions without leaving harsh lines.
💧 When To Use A Wet Palette
A wet palette is incredibly useful here. It slows drying, keeps paint consistent longer, and helps you manage pigment buildup. It also prevents your paint from separating or drying too quickly between coats.
Real User Insight:
“If you’re doing small details, brushing airbrush paint gives better control. Just know you’ll be doing 3+ coats.” — Forum post, ModelShipWorld.com
⚠️ Common Issues & Troubleshooting
Even though airbrush paints are compatible with brushes, you might run into a few issues—especially if you’re used to standard acrylics. Here’s how to troubleshoot the most common problems:
❓ Why does the paint look transparent?
Airbrush paint is pre-thinned and lower in pigment density compared to brush-specific paints. This is totally normal. Apply multiple thin coats rather than trying to get coverage in one pass. Using a colored primer can also help.
🖌️ Why am I getting brush strokes?
The fluid nature of airbrush paint can make it harder to control without proper technique. Try these fixes:
- Use a soft, high-quality synthetic brush.
- Apply with smooth, even strokes in one direction.
- Avoid overworking the surface as the paint dries quickly.
- Let each layer fully dry before applying the next.
🔄 Can I mix airbrush paint with regular acrylics?
Yes! In fact, it’s a great way to tweak consistency. Just make sure the paints are from compatible systems (e.g., water-based acrylics). Mixing a bit of regular acrylic into airbrush paint can give it more body for brushwork.
💾 How do I store leftover thinned paint?
If you’ve decanted airbrush paint onto a palette, don’t put it back into the bottle—it may be contaminated. Store leftover paint in airtight dropper bottles or well-sealed containers. Label them clearly and use within a few weeks for best results.
✅ Conclusion & Recommendations
Using a brush with airbrush paint is not only possible—it’s surprisingly versatile. While these paints may require more layers for full coverage, their fluidity opens up new creative possibilities, especially for fine detail work, glazing, and corrections.
Key takeaways:
- Airbrush paints are thinner by design and behave differently with a brush.
- Expect to layer more, but also enjoy smoother blends and better flow.
- Strategic use cases—like edge highlighting or glazing—make brushing airbrush paint a great tool in your painting workflow.
- With the right techniques, tools, and patience, you can achieve professional results.
Whether you’re out of your usual brush-on paints or exploring new methods, brushing with airbrush paint is a skill well worth adding to your toolbox.