Cleaning an airbrush is likely one of the most important parts of maintaining a properly functioning airbrush. But knowing when to clean your airbrush, and how often to clean it can be difficult.
Especially if your new to the world of airbrush.
Anyway, let’s get straight into it… How often do you need to clean an airbrush?
Well this depends a lot on your specific circumstances as we will discuss shortly down this page, but in simple terms:
You should do a “simple clean” of your airbrush after every session (sometimes during), and a “deep clean” at the end of each week (Assuming you airbrush daily), or once the airbrush begins to feel unresponsive due to paint buildup inside it.
However, if you intend on leaving your airbrush for multiple days at a time, a deep clean is likely necessary. Simply because you don’t want to leave paint residue in the airbrush for an extensive amount of time. Especially urethanes, enamels, lacquers, and so forth…
However, further factors will likely impact how often you should clean your airbrush. Continue on to learn more.
Airbrush Cleaning Intervals
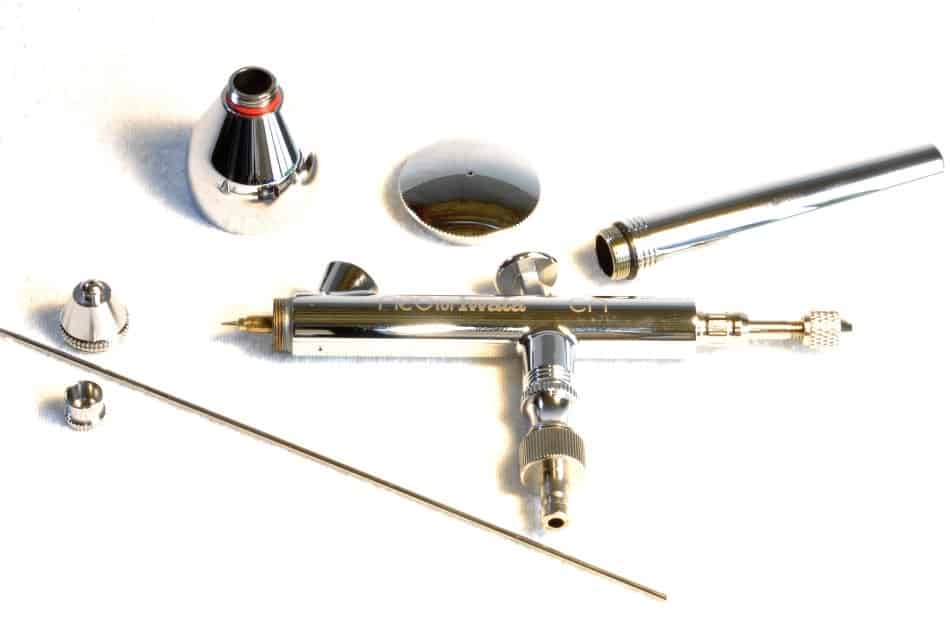
First of all, You will notice I refer to specific cleaning methods as either a “Simple Clean”, or a “Deep Clean”. This simply refers to how detailed the cleaning will be. I have also split the below section up into when each should be done, or will need to be done.
To learn more about the differences between a “simple clean”, and a “deep clean”, Take a look at my in depth airbrush cleaning guide. It will walk you through both a deep clean, as well as a simple clean.
Anyway, let’s begin.
When To Do A Simple Clean
A “Simple clean” is achieved by simply rinsing out the airbrush using paint thinner, or airbrush cleaner. It won’t require a whole lot of time in order to do it, and doesn’t typically require much disassembly of the airbrush (Depending on your airbrush).
However, do note, a “simple clean” isn’t likely to remove all the paint residue from the airbrush, as a “deep clean” will do (Assuming its done right).
Now you’re probably thinking: “Then why wouldn’t I do a deep clean every time I clean my airbrush?”
Well, a “deep clean” requires complete (or near complete) disassembly of the airbrush. Now if you were to do this in the intervals specified for a “simple clean” you would spend more time breaking down your airbrush to clean it then you would using it…
Plus, taking an airbrush apart to this extent often can result in damaged / worn out components, due to the stress put on the parts each time you tighten and loosen each individual part. Not to mention, your seals are bound to wear out quickly by doing a deep clean often.
Granted there are going to be times when you might need to do a deep clean often, but those will be specified later when we discuss “Deep cleaning”
Anyway, let’s talk about when to do a simple cleaning of your airbrush:
For the most part a simple cleaning should be done at specific times, such as:
- At the end of an airbrush session
- When changing colors
- Sometimes during a session if the airbrush begins to feel clogged and / or unresponsive
Again, you can learn how to do a “simple cleaning” by reviewing my Airbrush cleaning guide.
Anyway, let’s discuss each in greater detail.
At the End Of Each Session
For most, doing a simple cleaning at the end of each airbrush session is going to be very important. This will rinse out the paint in the paint cup, as well as throughout the airbrush internals, leaving it ready for you the next time you go to use the airbrush.
When Changing Colors
Of course nobody paints with the same color. So when changing colors you’ll need to do a simple clean in order to prepare the airbrush for the next color, otherwise you could end up with color contamination (Colors Mixing Unintentionally). Resulting in a color you most likely weren’t intending…
So in order to eliminate “Color contamination”, do a “simple cleaning” between color.
I actually wrote a guide specific to changing colors in an airbrush. If you’d like to check it out, Its titled: How to clean an airbrush between colors (Changing Colors)
Sometimes During A Session
As some time passes during your airbrush session, its common to see layers of semi-dry paint begin to build up inside the airbrush paint cup.
This is commonly due to paint drying on the walls of the paint cup as it is exposed to the open air. Each time you add more paint to the paint cup a new paint layer is formed as the paint level inside the cup begins to go down.
These layers can build up and begin to cause trouble to the airbrush as the thicker (semi-dried) paint begins to make its way inside the airbrush. Clogging is a common symptom of thick paint building up inside the airbrush due to it sitting in the airbrush for too long.
Usually just a simple cleaning will be enough to remove the paint build up. However, if you continue to experience troubles with the airbrush after doing a simple clean, you may need to do a deep clean.
Granted this does depend on the paint type to which you are using (it commonly occurs when using water-based paints)
To avoid this, I typically will do a “simple clean” each time I apply new paint to the airbrush paint cup. Or at least every other time. Similarly to how you would if you were changing colors.
This basically removes the (soon to be crusty) paint before it semi-dries, leading to greater issues later like clogging.
When To Do A Deep Clean
Now, a “Deep Clean” is essentially a “simple clean” just were going to be going much deeper into the cleaning process. Which typically requires full (to near full) disassembly of the airbrush in order to get in all the nooks and crannies.
For guidance on deep cleaning your airbrush, be sure to check out my in depth guide on How to clean an airbrush
Determining the optimal time to deep clean an airbrush isn’t as simple as saying: “it should be done 1/3rd the way through a session, and at the end of a session”. Rather a deep clean will be dependent upon a few different factors.
But don’t worry, I will specify exactly what I mean by this under each factor, and when the optimal time is to deep clean your airbrush based on a few scenarios.
Deep clean intervals will depend on the following:
Now typically, you will want to “Deep clean” your airbrush once a week. Assuming you use your airbrush daily. However depending on if your airbrush acts up and begins to feel unresponsive or clogged then you may need to do a “Deep clean” sooner.
A few Deep clean factors to consider:
- The Paint Type Your Using
- How Often You Use The Airbrush
- If Problems Begin To Occur That A “Simple Clean” Can’t Solve (Major Clogs)
The Paint Type Your Using
The kind of paint you choose to airbrush with will have somewhat of an impact on how often you’ll want / need to do a “Deep clean”.
For instance, If
Because as you may know, enamel paint is designed to be durable when it dries. Meaning it’s gonna be a bugger to try and get out of an airbrush once it has dried.
Same story when using Urethanes and/or lacquers in an airbrush.
But when using water-based paints such as acrylics. Cleanup isn’t to difficult even if a small amount of paint residue is left behind.
So moral of the story is, If your going to be airbrushing with solvent-based paints, which are commonly more resilient once dried I would suggest “Deep cleaning” the airbrush at the end of every session, or at least a “semi-deep clean”.
However, water based paints only typically require a “simple cleaning” at the end of every session, and a deep clean every few sessions…
How Often You Use The Airbrush
If your going to be airbrushing daily, and you only commonly use water-based paint in your airbrush. Doing a deep clean once a week is usually about right. However, if you only airbrush, say, 1 day a week, or only every now and then, Then it’s going to be best to deep clean the airbrush more often.
The scenario you want to avoid here is: leaving paint residue in the airbrush for an extensive amount of time.
For instance, If I’m, say, going on vacation for a week or 2 and will not be using my airbrush during that time. I’ll do a “deep clean” to remove all the paint residue before leaving it.
This will keep any potentially left behind paint residue from drying completely inside the airbrush. As well, it gives me a sense of cleanliness when I get back and start working with my airbrush.
For me personally, It’s similar to making my bed every morning. At the end of the day I’ve got a well made bed to come back to, or in this case, a well cleaned airbrush to come back to… I don’t know about you, but something about coming back to a clean airbrush gives me a sense of ease, as I don’t have to worry about the airbrush having any problems that need to be addressed…
Anyway, lets move on…
If Trouble Arises
Unexpected occurrences such as clogs and so forth can potentially trigger the need for a “deep clean” in order to bring the airbrush back to proper working condition.
If you begin to feel the airbrush act up, such as: you find it spitting globs of paint rather than atomizing it. Or you simply find the airbrush won’t spray at all…ect. I would suggest you begin with a “simple clean”.
But a simple clean isn’t always the answer.
If you find your problem consists. Then do a “Deep clean”. 90% of the problems people have with an airbrush are due to a dirty airbrush. So essentially, by deep cleaning your airbrush your likely to solve the issue you may be experiencing. Assuming you begin to experience problems with your airbrush.
Conclusion
At the end of the day, the interval you choose for cleaning your airbrush will depend upon the factors listed above. Given that there is such a large variety of paints available to be used, and everyone airbrushes in a different manor, Its difficult to say the exact time interval to “Simple clean” or “Deep clean” your airbrush.
But, I believe (based on the information above) you will be able to decide a good cleaning schedule that fits you and your airbrush habits. Plus, as time goes on, and you become familiar with the paint your using, you will be able to narrow down your cleaning intervals precisely.
Anyway, I hope you were able to find some value here! If you have any further questions regarding the airbrush do be sure to take a look around the website. Airbrush Insider is dedicated to helping all in the airbrush community!
This is Colt signing off!
Check Out Some Of My Favorite Airbrush Equipment:
- My Favorite Airbrush To Date!
- The Air Compressor I Currently Use, And Why I’m Never Going Back To A Traditional “Airbrush Compressor”!
- My All Time Favorite Airbrush Paint’s For Ease Of Use & Versatility!
For a complete walk through on cleaning your airbrush be sure to take a look at my latest guide on the topic titled: How to clean an airbrush Right! Plus, I include a few tips that are likely to speed up the cleaning process. As well as, make it a better experience!