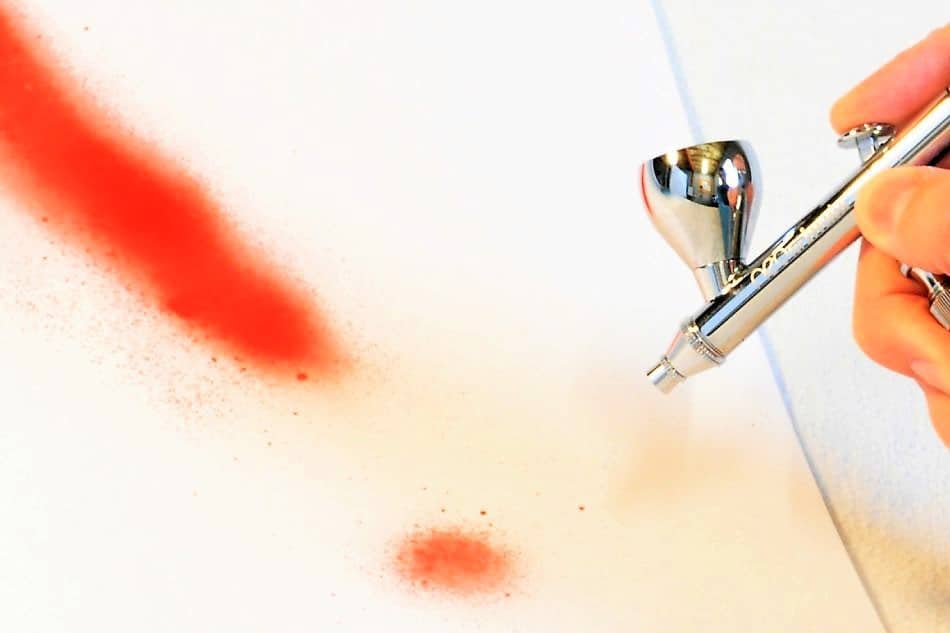
One of the biggest problems beginner airbrush artists struggle with is clogging… Yep, the nozzle of the airbrush becoming plugged up with gunk, thick paint, dried paint, and so forth…
But then again, it’s not only beginners that struggle with this. I, as well as many others who have been around for some time deal with clogging every now and then, and I know just how frustrating it can be. Especially if you don’t know why it is happening…
So, if you’re struggling with this issue, read on. We are going to go deep into the different causes behind clogging, as well as, how to go about fixing it.
But before doing so, I must explain what “Tip Dry” is. Simply because it is commonly confused with a clogged airbrush.
Tip dry: is a buildup of dry paint on the tip of the airbrush needle. Tip dry is a common occurrence when using an airbrush, and will typically present itself by making the airbrush appear clogged and / or unresponsive, until you pull the trigger back significantly, to which will send the dry paint hurdling off the tip of the needle (Usually).
Tip dry commonly occurs minutes after beginning to airbrush, and will need to be cleaned off the tip of the needle every couple minutes or so…
Now, if you believe tip dry could be your issue. Do take a look at my recent article on: how to minimize tip dry. There I go into detail on methods for reducing how often tip dry occurs, as well as methods to clean off tip dry when it does occur.
Nonetheless, if you believe your airbrush is clogging internally then do continue on!
Potential Culprits For A Clogged Airbrush & How To Fix It
First off, I know there are a multitude of different liquids that can be sprayed through an airbrush. Anything from paint, ink, makeup and so forth.
However keep in mind, this guide was made with the assumption you are spraying paint through your airbrush. However, no matter the industry you are in and the medium you spray through your airbrush this will apply to you.
That being said, there are a multitude of different reasons as to why an airbrush might be clogging. Odds are you’ll have to do a little testing and analysis to figure out what exactly might be clogging your airbrush. That is, assuming the issue is occurring quite frequently, and your un sure as to what could be causing it.
But, based on my experience, I have come up with a few, if not, all of the possible reasons as to why your airbrush might be clogging. As well, I have provided you some possible solutions to try out under each potential cause that I have personally used when dealing with a clogged airbrush.
A Dirty Airbrush
A possible, and likely culprit could be dried paint / gunk that got left behind from the last time you cleaned the airbrush. Whether the gunk got knocked loose during use and plugged the nozzle, or the build up around the nozzle outlet just became so much that the paint / material can no longer flow from the airbrush nozzle.
A Good cleaning is a great place to start if your having troubles with clogs
Solution:
If your unsure at to what could be causing your airbrush to clog then the best thing you could do is a deep clean of the airbrush internals. This will remove any dried paint build up that may be causing your issue.
Here is an article I wrote recently on How to clean an airbrush. A good cleaning is the best place to start if you are having any troubles with clogging.
If you continue to experience clogging after cleaning the airbrush, odds are it may be one of the other culprits listed here on this page.
If so, continue down the list.
Paint Viscosity To Thick
Likely one of the largest culprits to a clogged airbrush is the viscosity of the paint. The airbrush is very sensitive to paint viscosity, too thick of paint can result in spitting / spattering as well as clogging of the airbrush.
Solution:
Try adding a bit more reducer to your paint before running it through the airbrush. But before you do so, be sure to clean out the thicker paint that is currently in the airbrush, as it could continue to cause the nozzle to clog, even after running reduced paint through the airbrush, as any left behind paint of greater thickness will likely get in the way during testing of the thinner paint.
For a complete walk through on paint reduction do be sure to take a look at my latest post on the topic: How to thin paint for an airbrush. If your having troubles with thinning your paint, I believe that article will greatly help.
Paint Type Incorrect
Granted you can pretty much spray any kind of paint through an airbrush, as long as it can be reduced to the necessary viscosity. However, Using just any kind of paint in an airbrush will likely prove to be a hassle.
To which you might be finding out the hard way. That is, assuming you’ve been experiencing extensive amounts of clogging.
Ideally, Its best to stick with airbrush ready paint, makeup, inks and so forth.
How to know if the paint is airbrush specific?
Typically airbrush ready paints, makeups, inks and such will be labeled airbrush ready. Meaning, somewhere on the bottle it will say intended uses, airbrush ready paint will have the word “Airbrush” listed. But if your un sure, you can always reach out to the manufacturer for questions.
Solution:
Ensure you are using a paint that is intended for airbrush use (Check the label for intended uses). Other paints like to plug up the airbrush either due to
If your not using an airbrush specific paint, I strongly recommend you do. At least if your in the beginning stages of learning how to airbrush. It will make your life much easier!
I learned this the hard way trying to save a few bucks on cheap (non airbrush) paints during my beginning stages of learning how to airbrush. The airbrush would plug up continuously during use, and I was getting more “Tip Dry” then I was paint on the paper…
For a list of the different paint options that work well with an airbrush, do take a look at my post on the topic: All about airbrush paint, and how to choose which to use.
Paint Condition Bad
The condition of the paint / material you are trying to spray through the airbrush can have a large impact on the way the airbrush acts.
Simply put, paint that has not been shaken well enough (Has clumps of pigment in it), or paint that is far to old to the point it has crusty / dried flakes of paint in it can become a major issue for an airbrush. Especially if you are consistently getting clogs…
Solution:
Begin by shaking your paint for a longer period of time, then try running it through the airbrush again. But clean the airbrush before the trial.
If the problem consists then either get some fresh new paint, or try to strain the clumps out of the paint using a paint strainer found on Amazon.
A way to test and see if your paint is bad, is to use a paint brush and apply some of the paint to a sheet of paper. Assuming you got a decent amount of paint on the brush, you will be able to see clumps within the paint on the paper.
But that’s assuming the paint is quite bad.
Air Pressure To Low
Another impactful factor to consider is the PSI level to which your airbrushing at. Air pressure and paint viscosity need to work in sync with one another. Otherwise you will get what is known as spitting / sputtering and even clogging.
The air pressure should be adjusted based on the viscosity of the paint / material you wish to spray through the airbrush. If you are using too low of pressure, then the air will struggle to pull the paint through and out the nozzle.
I say pull the paint through instead of push the paint through, because for most modern airbrushes, the air and paint mix after the nozzle rather then before the nozzle. This means if your pressure is to low for the viscosity of the paint, then odds are the pressurized air flowing past the nozzle won’t be able to pull the paint through.
To better illustrate this point do be sure to check out my article on: How an airbrush works.
Solution:
But simply put, you could be experiencing clogging due to your air pressure being to low when you airbrush. To learn how to set your air pressure take a look at my article on the topic: How to set the PSI for an Airbrush.
But the quick solution is to try turning up the PSI in small increments at a time, and see if the issue relieves itself. But odds are you will need to tinker with the viscosity of the paint as well. Given that the PSI and paint viscosity work with each other when airbrushing.
The thicker your paint the more PSI you will require. The thinner your paint, the less PSI you will require. Odds are your paint is on the thicker side if you are experiencing clogging. Increased air pressure could relive the issue, but you may be working with a PSI greater then needed.
Airbrush Nozzle Size Small
Though the nozzle size of an airbrush isn’t exactly the cause of an airbrush clogging. Clogging is prone to occur more often when using an airbrush with a smaller nozzle. Say, 0.2mm or smaller for example.
Though this does relate back to the above culprits. Precisely the viscosity of the paint, and the air pressure being used.
Airbrushes with a smaller nozzle size require thinner paint then the larger size nozzles do. So if you’re using an airbrush that is equipped with a smaller sized nozzle. Then you need to ensure your paint has been thinned down, typically even more than would be required with a larger nozzle size.
Just something to know.
Conclusion
If you find you struggle a lot with your airbrush clogging on you in the middle of an airbrush session, then the best way to begin to find the culprit is by deep cleaning the airbrush. I can’t tell you how many problems I have run into from simply a dirty airbrush.
Next run through the above list of potential causes. Odds are your culprit will be there, especially if you experience clogging often.
Anyway, I hope you were able to find some value here! If you have any further questions regarding the airbrush do be sure to take a look around the website. Airbrush Insider is dedicated to helping all in the airbrush community!
This is Colt signing off!
Check Out Some Of My Favorite Airbrush Equipment:

