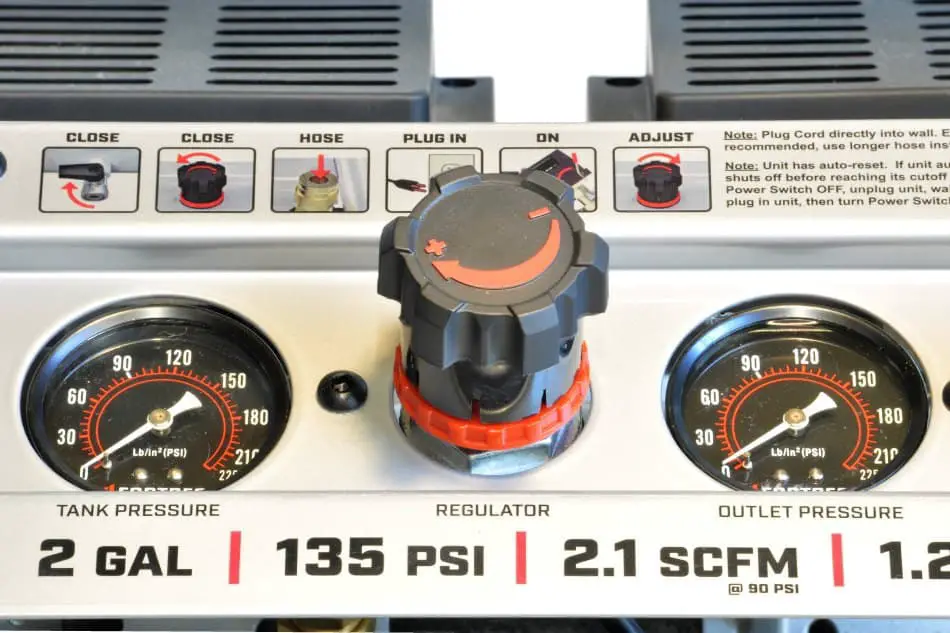
When it comes to using an airbrush, air pressure (PSI) has a large part to play in the overall workings behind the airbrush. But knowing the proper PSI to use is likely going to be different from one user to the next.
Simply speaking, required air pressure for an airbrush is not a specific set amount, commonly it depends heavily on multiple factors such as the airbrush type your using, the viscosity of the material to which you intend on spraying through the airbrush, the surface to which you intend on painting, and so forth… (More on these impacting factors later)
You see, asking: “What PSI to use for an airbrush?” is only half of the overall question to which many should be asking.
Rather, the question should be phrased something more along the lines of: “What PSI should I be using based on the thickness of my paint, and the object being painted?”. This is because paint viscosity, and air pressure both feed off one another.
Meaning, the thicker the paint, the greater the air pressure you will require, and the thinner the paint, the less pressure you will require. That is, in order to achieve an optimal spray pattern.
But the big takeaway here is that the consistency of the material to which you choose to spray through your airbrush is likely going to have the largest impact on the pressure required for you.
That being said, If I had to state a commonly used PSI range for that would work best for the majority of airbrush artists out there, then I would say:
A good starting PSI range for most utilizing an airbrush is somewhere in the neighborhood of 15 PSI – 45 PSI. That’s typically the range I personally work in, Along with many others in the airbrush community.
But that’s not to say that, that PSI range is going to work for you.
Let’s now discuss some of the factors that impact what you should set your PSI at when airbrushing. Because as you will soon learn, Air pressure can vary a lot depending on many conversing elements.
But do stick around, because later I will walk you through the steps necessary to find the proper PSI you should be using for your specific airbrush setup.
The 5 Factors That Impact Airbrush Air Pressure (PSI)
Simply put, there are 5 Major factors that impact the PSI to which you should be using for your specific circumstances. Those are as follows:
- The Airbrush Feed Type Your Airbrush Uses (Paint Cup & Location)
- The Airbrush Nozzle & Needle Size You Use
- The Material Type & viscosity You Intend To Spray
- The Distance From The Surface Your Spraying
- The Surface Type Being Sprayed & Task At Hand
If you’re unclear as to how any, or all of the above factors impact Airbrush PSI settings then read on, I’ll explain each in depth.
Airbrush Feed Style
First let’s discuss how the airbrush feed style effects the PSI level to which you will likely need.
Note: By “Airbrush Feed Style”, I simply mean the method to which your airbrush utilizes to both hold, and deliver material (Paint, Makeup, Ink…) to the atomization chamber (Inside the airbrush). I say “Material”, simply because paint is not the only material people spray through an airbrush, though it is the most common.
The 3 Most common feed options are as follows:
- Gravity Feed Airbrush (Discover if your using a Gravity Feed Here)
- Side Feed Airbrush
- Siphon Feed Airbrush (Discover if your using a Siphon Feed Here)
Now, you’re probably wondering, How does the feed type / Cup location impact the PSI requirements?
Well, simply speaking, it depends on if your airbrush requires added air pressure to aid in getting paint into the atomization chamber of the airbrush.
For example: A Siphon feed airbrush requires added PSI in order to operate correctly versus its opposite, the gravity feed airbrush.
The siphon feed airbrush (Which places the paint bottle under the airbrush) needs more air pressure to assist in sucking the material (paint, makeup, ink) up, and into the atomization chamber. Where as the gravity feed (Which places the paint cup on top of the airbrush), simply utilizes the power of gravity to feed the material into the atomization chamber.
This essentially allows the gravity feed airbrush to operate on much lower air pressure then that of the siphon feed.
The side feed airbrush is basically a middle ground between Siphon feed, and Gravity feed as it locates the paint cup at the side of the airbrush.
To better illustrate this point, let’s discuss the most common PSI ranges per each airbrush feed option.
PSI For Gravity Feed Airbrush
Commonly recommended air pressure (PSI) for a Gravity feed airbrush is anywhere between 12 PSI – 45 PSI depending on the viscosity of the material being sprayed.
PSI For Side Feed Airbrush
Commonly recommended air pressure (PSI) for a Side feed airbrush is anywhere between 12 PSI – 45 PSI depending on the viscosity of the material being sprayed.
PSI For Siphon Feed Airbrush
Commonly recommended air pressure (PSI) for a Siphon feed airbrush is anywhere between 25 PSI – 80 PSI depending on the viscosity of the material being sprayed.
Keep in mind, the above parameters are not hard stops, you can certainly break outside if you so desire. However, these parameters are commonly used ranges that are specific to each feed option. But this can change depending on the job your doing.
Airbrush Nozzle & Needle Size
Granted an airbrush nozzle and needle are commonly sized to fit one another. So, really it’s a change from one size to another of each (The Nozzle & Needle) that will impact PSI requirements.
Let’s begin by discussing some of the common Nozzle / Needle sizes used today. (keep in mind other sizes are available, the below list is simply commonly found sizes)
- 0.2mm Small
- 0.35mm Medium
- 0.5mm Large
As you can see (In the list above) 0.2mm is the smallest, and 0.5mm is the largest. This size difference is essentially the size of the opening where atomized paint flows from as it leaves your airbrush.
This size different can impact the amount of PSI required due to the thickness of the material flowing from the airbrush.
For example, say your using an airbrush with a 0.2mm size needle, and I am using an airbrush with a 0.5mm needle size. Well, my 0.5mm needle would require less air pressure then your 0.2mm needle (assuming we are both using the same paint type and viscosity).
Simply because, the smaller the nozzle size, the harder it’s going to be for the material to leave the nozzle of the airbrush. That is, assuming your using a thicker viscosity of paint.
But if you properly thin your paint to a thinner viscosity (when using a 0.2mm needle size), then when using a 0.5mm, essentially you could get the airbrush to operate on the same PSI as that of a 0.5mm size needle. The difference would be in paint viscosity rather then PSI.
But that’s assuming the paint in the airbrush with the 0.5mm Nozzle & Needle is thicker then the paint in the airbrush with the 0.2mm Nozzle & Needle.
So basically, Material viscosity is a large factor in this instance. To which we will be discussing next. However, I bring this up simply because many find themselves switching Nozzle & Needle sizes, but use the same viscosity of paint, and wonder why their airbrush isn’t spraying how it used to…
Material (Paint / Makeup) Type & Viscosity
Given that an airbrush can spray many different materials such as, Paint, Makeup, Ink and so forth. It can be difficult to determine the proper PSI for each.
Not to mention the different viscosity options, inside of each material that can be sprayed through an airbrush.
For example, airbrush paints come in a variety of different options… From water based to oil / solvent based, From Opaque to Transparent…ect.
Simply put, there are many different options available, and what comes from each of those options is commonly a difference in how each acts when going through the airbrush. Typically because the viscosity of the material differs from one paint to another.
Taking from the following example: Opaque paints tend to be much thicker than transparent paints (When taken straight out of the bottle). This means you will need to either increase air pressure when switching from transparent paints to opaque, or increase the amount of paint reduction (Make the paint thinner).
Do Note: The viscosity of the material (Paint, Makeup, Ink…) you’re spraying through the airbrush will have the largest impact when determining the proper PSI to use.
Simply put,
The thicker the paint, the greater PSI you’ll require. The thinner the paint, the less PSI you’ll require.
We will discuss how to find the correct PSI later on down this page, but based on the statement above, The hardest part when determining where to set your PSI is rather in finding the proper paint viscosity before going about finding the proper PSI level. Learn how to thin your paint properly Here!
At the end of the day, the goal is to achieve a proper spray pattern. To which will be achieved by setting the air pressure, to the paint viscosity, or vice versa.
This essentially means there are 2 methods to which you can go about achieving a perfect spray pattern:
- The first, is to regulate the air pressure (PSI) to the current viscosity of the paint.
- The second, Is to adjust the viscosity of the paint to the current regulated air pressure (PSI)
- The BONUS method, Is to do both! First achieve a properly thinned paint, then begin to regulate your air pressure to the paint. Assuming the paint is thinned to the viscosity you desire, seting the air pressure should be easy.
You see, the issue with regulating the air pressure to the paints viscosity (out of the bottle) is that, yes you could end up with a good spray pattern, but at 50 PSI plus (if the paint is to thick). Taking the time to reduce your paint before hand will likely reduce the amount of air pressure you need to use.
Rather in this case, it would be ideal to thin the paint, and then begin to set your PSI somewhere in the recommended PSI range (As listed above under “Airbrush Feed Cup / Bottle”). Assuming your paint needs to be thinned. As sometimes you may not need to thin it, but under most cercumstances you will.
Granted your going to be required to regulate the air pressure to the paint viscosity no matter what. Simply adjusting the viscosity of the paint will more or less be to keep you within reasonable boundaries. You don’t want to be having to airbrush with 100 PSI on canvas due to your paint being so thick it won’t spray at any less…
Material viscosity is commonly the root of many major issues people experience when trying to airbrush. If the viscosity is to thick you could also experience clogging of the airbrush. If you find you experiance clogs often, due check out my latest post on the topic. Why your airbrush clogs & how to fix it.
Distance From Paint Surface
By distance I simply mean the distance your spraying from the surface to be painted.
Your distance from the surface or object to be airbrushed will impact the PSI that will best suit you at the moment. This is because spraying at a high pressure, at close proximity to your canvas could result in what is known as Spidering.
Spidering, in simple terms, is the occurrence of paint pooling up on the painted surface then being swept by the air flow. Essentially creating what looks like the paint is hitting the surface then running away.
Granted spidering can occur even when using the correct PSI for the distance. However, its more likely to occur when using higher pressures, and when working at close proximity to the canvas.
Now, How is air pressure affected when working at a greater distance to the painting surface?
The flip side is, when working at a greater distance from the surface to be painted, its ideal to be using a little bit greater PSI to aid in the distance the atomized paint needs to travel.
Now, It’s important to not go overboard here. As raising your air pressure to much could result in extensive overspray.
Summed up
You’ll likely see over time (with practice) how air pressure needs to be adjusted based on the distance your spraying from the surface. Its common for painting surfaces that are nonporous to require a greater adjustment in air pressure (PSI) then surfaces that are porous.
This is because paint will skate across harder surfaces easier then porous or absorbent surfaces.
Keep in mind:
- The Closer you are to the painting surface the less PSI you will typically require
- The Farther you are from the painting surface the greater PSI you will typically require
Surface Type & Task At Hand
Kinda like we discussed above about how spidering is likely to occur most often on harder surfaces then it is on porous or absorbent surfaces.
Well the surface structure you are painting on is likely going to impact the air pressure you require. Simply due to the fact of how the paint acts when it hits the surface, as well as the task at hand.
Let me explain,
Surface Type:
The harder the surface, the less PSI you want for the job the closer you get to the surface.
For example: Auto body airbrush artists commonly use between 20 PSI – 45 PSI. However, T-shirt airbrush artists commonly use between 60 PSI – 80 PSI.
This is because the surface in each example is essentially opposite to one another. Automotive surfaces are hard, while T-shirts (clothing) Is soft and absorbent.
Plus T-shirt airbrush artists use such high air pressure to essentially embed the paint into the fibers of the shirt. In simple terms this makes the paint last longer through more washes, as the paint has been forced deeper into the fibers then if say, 40 PSI was used.
this now leads us into how the Task / Job at hand can Impact PSI requirements.
Task / Job:
Depending on what it is your trying to achieve with your airbrush. Air pressure can play a large factor in the overall outcome. Not to mention, using to High of an air pressure can become dangerous in some industries.
For example,
Many like to airbrush makeup, and body art. To which entails spraying directly on to the skin.
But using to high of an air pressure under these circumstances can lead to possible injury, can even prove fatal if severe enough. This is because compressed air can make its way inside the body and cause serious problems.
For this reason, a majority of the retail airbrush makeup compressors have a max PSI of 20 PSI.
But then you have the other side as discussed above. T-shirt airbrush art which utilizes close to 100 PSI.
This means,
Simply the surface your airbrushing on, and the job you’re trying to achieve can have a large impact on the pressure range to which you must stay within.
Granted the above examples are basically the 2 extremes when it comes to using an airbrush. But even if your simply airbrushing on paper, odds are, 20 – 40 PSI will be more than enough (Assuming your paint is thinned properly). But it all depends on the situation.
Now that your board out of your mind, with the determining factors behind setting your air pressure. Let’s move on to where the rubber meets the road!
How To Set Proper PSI For Your Airbrush Needs
At the end of the day, the goal is to achieve an optimal spray pattern with your airbrush… Not too much over spray, but just the right amount of atomization to achieve a smooth and consistent finish.
However, it can be somewhat difficult to find the proper PSI setting when you’ve never done it before. For this reason I have created a list of steps to guide you through the process.
Step 1: Determine The Task To Be Achieved
First: Determine the Task to which your trying to achieve, or the surface your painting.
For example, If your airbrushing your makeup on? It’s commonly recommended for makeup airbrush artists to use a max of 20 PSI (for safety reasons)
Another example, If your doing automotive airbrush work, odds are 15 – 35 PSI will be an ideal pressure range for your needs.
Below is a table of commonly recommended PSI ranges for common industries that utilize an airbrush.
| Industry | Common PSI Range |
|---|---|
| Automotive Airbrushing | 15 PSI – 35 PSI |
| Miniatures & Model Airbrushing | 10 PSI – 40 PSI |
| Airbrushed Makeup | 10 PSI – 20 PSI |
| Airbrushed Body Art | 10 PSI – 20 PSI |
| Airbrushed Spray Tan | 15 PSI – 20 PSI |
| Fine Art (Photorealistic paintings) | 10 PSI – 35 PSI |
| T-shirt (clothing) Airbrush Art | 30 PSI – 80 PSI |
| Cake decorating | 15 PSI – 20 PSI |
Keep in mind the above list is simply common recommendations from the community. By no means must you stay within the above ranges, unless it proves dangerous, or could potentially cause damage. Plus the airbrush feed type to which your airbrush uses can impact these numbers. To which will be discussed next.
Step 2: Consider The Feed Type
Second: consider the Airbrush feed type your using. As different feed styles require different PSI ranges. (Refer to the above section Titled: “Airbrush Material Feet Type”)
| Feed Style | Common PSI Range |
|---|---|
| Gravity Feed | 12 PSI – 45 PSI |
| Side Feed | 12 PSI – 45 PSI |
| Siphon Feed | 25 PSI – 80 PSI |
But again, The above ranges are simply what is commonly used in the airbrush community. Certainly don’t feel you must stay within the recommended PSI range as listed here.
Step 3: Paint Viscosity
Now, your to the point of actually spraying material (Paint, Makeup, Ink…) through your airbrush.
Based on the above 2 steps, you should have an Idea as to the PSI range that will best suit your needs. But now we need to go through the process of reducing your Paint, Makeup, Ink… Whatever your airbrushing, it needs to be thinned to a consistency that will smoothly & effortlessly flow through the airbrush.
You see, one of the largest issues airbrush artists deal with is clogging of the airbrush (Along with “Tip Dry” but that’s another story…). Clogging typically occurs when the material being spray through the airbrush is too thick for the current PSI settings. Or, the material is simply too thick in general.
However, given that Material reduction is such a large topic to cover, I’ll simply link to my latest post on the topic of reduction.
At the time of this writing, I have only written an article specific to Reducing (thinning) Paint for an Airbrush to which can be found here.
But once I get to Makeup reduction, or other material reduction articles I’ll link to them here.
But the overall relationship between Air pressure and paint viscosity is as follows:
For thicker paint: you’ll likely need to turn the air pressure up higher in order to achieve an optimal spray pattern. This is because the thicker the paint, the harder it is for it to flow the the small nozzle on the end of the airbrush.
For thinner paint: you’ll be able to work with lower pressure as the paint is better able to flow and atomize then that of thicker paint.
Now, If you find yourself turning the PSI up significantly higher then is to be expected (As from the PSI ranges listed above) in order to achieve an optimal spray pattern, then try reducing your paint a little more.
If at any time you find the paint is not spraying to your liking then odds are you’re using an improper PSI setting, or your paint hasn’t been reduced to the proper consistency.
Now, your likely asking “But how do I know my airbrush is spraying correctly???”
Well, lets go over how to go about testing your spray pattern, and shortly thereafter we will go over what to look for.
Testing Your Spray Pattern
Assuming you went over, and took a look at my article about paint reduction for an airbrush. You should now understand how to go about reducing your paint.
If you didn’t, I suggest you go check it out Here.
Anyway, Now you need to test the spray pattern of your (recently reduced) paint.
I like to begin at the lower end of the Ideal PSI range for the task / surface being painted, and the airbrush feed type (to which can be found under “Step 1” & “Step 2” Above).
Then Gradually turn up the PSI until I get a spray pattern I like.
Do Note, If you find yourself turning the pressure up past the recommended PSI range for the airbrush then it’s likely you’ll need to reduce your paint (material) greater. But not always.
What to look for
As you gradually turn up the PSI there are signs you’ll want to look for that will basically Say, “You’ve Found The Correct PSI”… Well, not literally, but you get the Idea…
When using paint, your going to be looking for:
- Smooth application & flow of the paint (meaning the paint is atomizing properly when it leave the airbrush)
- Aim for as clear & clean of a line as you can. Do your best to minimize overspray without sacrificing atomization of the paint.
- Control… If the airbrush feels un responsive, or like its difficult to control try adjusting the PSI up & down. Your looking for consistent & reliable control of the airbrush.
All you can really do is tinker with it. Eventually you will find a PSI that works great for you.
Step 4: Minor Adjustments
Now your getting to the point where minor adjustments may need to be made depending on if you swap paints, make adjustments to your airbrush, or simply change the distance your spraying from the painted surface.
For example, when going from spraying a large base coat to getting up close and personal with your peace to work on fine detail. Lowering the pressure will likely be needed to prevent spidering
When To Adjust PSI Based On Distance
It’s likely one of the largest factors you will have to deal with when in the middle of an airbrush session is simply adjusting PSI based on the distance you’re working from the canvas. This adjustment should typically go as follows.
The closer you are to your piece the less PSI you are likely to need.
Now, you’re likely asking, but why?
Well, this is done in order to reduce the likelihood of an issue known as spidering. By simply lowering the psi when working in close proximity to the surface being painted, you can reduce the likelihood of spidering. Which will intern allow you to produce a better piece of work.
The opposite is also true.
The farther you are away from the surface being painted, the higher the PSI you are likely to need.
This pressure increase is done to help propel the paint onto the canvas when at a farther distance, also it helps with better atomization. But do be careful, as increased pressure will add to the amount of overspray in areas you don’t want it. But using stencils can help to control overspray. Check out my latest post titled: “How to manage overspray” for overspray management tips and techniques.
Now don’t get me wrong, this adjustment should be quite minimal (depending on the task at hand), but under most circumstances you should be making small adjustments to the PSI level.
How Airbrush Adjustments / Changes Can Impact PSI
Another factor you are likely going to need to take into consideration is the fact of airbrush adjustments and or changing from one airbrush to another.
Simply going from one airbrush to another that is of different specs can actually impact the current PSI settings you have set. By that I mean, going from, say, using an airbrush with a 0.5Mm needle to an airbrush with a 0.2Mm needle.
Now you’re probably wondering, why would I switch airbrushes?
Well it’s common for airbrush artists to use, say, a 0.5Mm needle when airbrushing shadows / gradient, or just for complete coverage. While a 0.2Mm needle is commonly used for fine detail work.
Do note, a 0.2Mm needle is not the only size around that parameter. You can also get a 0.18Mm and so forth. I just use 0.2Mm as a round number in this example.
Anyway, when going from a 0.5Mm needle size, to a 0.2Mm you are likely going to need to adjust both your air pressure along with the paint viscosity. But this all depends on the outcome after you’ve gone through the steps listed above.
You may find that your current settings all work fine with very minimal adjustment in the PSI and/or paint viscosity. But this all just depends upon how the new airbrush is acting.
But in simple terms, an airbrush with a 0.5Mm needle is likely going to require less PSI then a 0.2Mm needle. However, this is assuming the paint viscosity is the same for each airbrush. Ideally it would be best to reduce your paint slightly more when going to a smaller needle size, then tinker with the PSI.
As its quite common to use thinner paint when airbrushing with a 0.2mm needle then you would with a 0.5mm needle.
The opposite is also true, when going from, a 0.2Mm needle, to a 0.5mm. it’s likely you will be able to thicken your paint if you so desire. And adjust your PSI slightly.
But this is all relative to the situation. Because different paint types and viscosities can act different depending on the airbrush and the current PSI settings.
But these are minor things you’ll get a feel for as your airbrush career progresses.
Conclusion
Overall, the process of finding the proper PSI setting for you and your situation isn’t hard by any means. It may be a little bit difficult in the beginning, but over time you will begin to understand and know what to look for.
I know I have gone into great detail on the different aspects behind what impacts PSI when using an airbrush, but this is simply because I want you to be completely prepared and understand the workings behind why your PSI needs to be adjusted from time to time.
In final,
Given the multitude of different factors that can impact the PSI necessary for your airbrush needs, I would suggest you simply spend some time tinkering with different PSI ranges and see exactly how it affects your airbrush spray patterns. But do be careful if you are in an industry where you’re spraying directly onto the skin, as this can be dangerous when using pressure greater than 20 PSI.
The best advice I can give you when it comes to setting your PSI is to simply,
Start by determining exactly what it is you intend on airbrushing. Typically different industries that utilize an airbrush will require different PSI ranges.
Second, determine the paint feed style to which your airbrush utilizes (gravity feed, side feed, siphon feed…) Each are likely to need more or less pressure in order to function properly.
Third, learn how to properly thin the material to which you intend on spraying through your airbrush. Foremost you will likely be using paint. If so, be sure to check out my latest post on the topic of paint reduction for an airbrush.
Fourth, at this point it’s likely going to be fine adjustments in your air pressure in order to achieve a well spraying airbrush.
If you’ve made it this far, I applaud you. I understand this was a long resource. However my goal here was to provide you with all the necessary information so that you understand exactly how to go about setting the air pressure for your airbrush.
Anyway, I hope you were able to find some value here! If you have any further questions regarding the airbrush do be sure to take a look around the website. Airbrush Insider is dedicated to helping all in the airbrush community!
This is Colt signing off!
Check Out Some Of My Favorite Airbrush Equipment: