Learning to use a new paint line with your airbrush can be daunting, especially with the different additives offered to manipulate the paint to your desired needs. But for those looking to start using Createx, Your in luck!
This will be an in-depth guide on how to use Createx airbrush paints.
Specifically the “Createx Airbrush colors” line, “Wicked Colors” line, and the “Createx Illustration Colors” line.
Each is manipulated in a similar way, from reduction to clean up. With their own subtle nuances that give each paint line its signature.
Anyway, without any further adieu, lets dive in!
I have been using Createx for the past year (As of the time of this writing). And have come to prefer Createx over any other paint manufacturer, but I didn’t always feel that way.
My Createx journey began constantly fighting the paint. As well as, available resources on the internet, which constantly contradicted each other…
But now days I feel I have found my groove with Createx, and have come to really enjoy using the product. But it took a lot of trial and error to get there.
My goal here is to minimize your learning curve with Createx so you can maximize your painting experience!
How To Thin Createx Airbrush Paints
First lets begin with the mediums, and processes used to thin the paint. I’ll share with you what createx recommends, then I’ll give you my take on how I personally go about using it.
Createx airbrush paints are thinned using 4011 Reducer (By Createx). 4011 is commonly used as a thinner for the “Airbrush Colors”, “Wicked Colors”, & “Illustration Colors” line of createx airbrush paints as well. 4013 Reducer Is an alternative option to 4011 Reducer for those who live in states or country’s that do not allow 4011 Reducer.
You may find sources that recommend the use of 4012 High Performance Reducer for all Createx Airbrush Paints. This used to be the recommended reducer, but now days Createx recommends the use of 4011 Reducer. 4012 is begin phased out but is said to still be available to those who desire it.
In the past I use 4012 High Performance Reducer to thin my Createx paints, but now days I use 4011 as it is becoming main stream. I haven’t noticed much of a difference between the 2 other then they smell different.
That being said, I have found both 4011 and 4012 dry the paint rather quickly. Which can be a positive for some, but I personally prefer my paints to dry a little slower to reduce tip dry and increases the pot life of the paint as it sits in my airbrush. So depending on the job at hand I’ll utilize a Home brewed thinner recipe that takes place of 4011 from time to time.
In addition to using 4011 to thin the paint, you can add some 4030 Balancing Clear (By Createx).
4030 balancing clear is intended to improve adhesion, and durability. As well as, Improve flow of the paint. Making it ideal for airbrush use.
That being said, 4030’s main purpose is for use on hard (Nonporous) surfaces when adhesion is important. Making it the Ideal additive for Automotive Applications.
For a complete run down on paint thinning / Reduction ratios do be sure to take a look at my complete guide on airbrush paint reduction. Over there, I walk you through the do’s and dont’s of paint reduction, and how to properly achieve optimal paint reduction for your needs.
That being said, lets discuss some of the recommended reduction ratios for Createx “Airbrush Colors”, “Wicked Colors” & “Illustration Colors”
Starting Reduction & PSI Ratios
Below are some starting reduction ratios & PSI settings for the three airbrush lines listed. Keep in mind each line of paints has its own intended use. For instance, Createx “Airbrush Colors” are best suited for complete coverage. While “Wicked Colors” & “Illustration Colors” are intended more for detail airbrush work.
I personally like to airbrush fined detail and have found the greatest success using “Wicked Colors” as it seams to flow better through my airbrush then “Airbrush Colors”. At the time of this writing, I have yet to utilize the full benefit of “Illustration Colors” but based on my current experience with the paint I’m looking forward to more time spent with it.
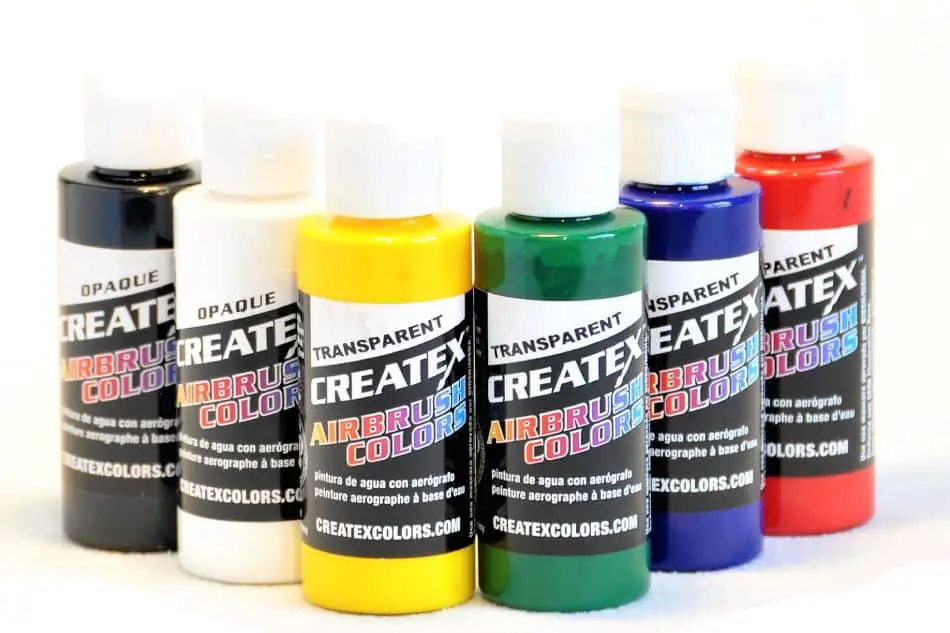
Createx Airbrush Colors
Opaque Colors:
| Airbrush Tip Size | Thinner To Paint | Suggested PSI |
|---|---|---|
| Large 0.5mm | Straight From The Bottle | 45 PSI +, (Thin for lower PSI) |
| Medium 0.35mm | Thin 20% – 30% + Per Volume. | 35 – 40 PSI +, (Thin more for lower PSI) |
Transparent Colors:
| Airbrush Tip Size | Thinner To Paint | Suggested PSI |
|---|---|---|
| Large 0.5mm | Straight From The Bottle | 35 – 40 PSI +, (Thin for lower PSI) |
| Medium 0.3mm | Thin 20% – 25% + Per Volume. | 25 – 35 PSI +, (Thin more for lower PSI) |
Createx “Airbrush Colors” are not recommended for airbrush tip sizes smaller then 0.3mm. For smaller tip sizes or detailed airbrush work opt for “Wicked Colors” or “Illustration Colors“.
Createx Wicked Colors
| Airbrush Tip Size | Thinner To Paint | Suggested Starting PSI |
|---|---|---|
| Large 0.5mm | Straight From The Bottle | 35 – 45 PSI +, (Thin for lower PSI) |
| Medium 0.35mm | Thin 10% – 20% + Per Volume. | 30 – 40 PSI, (Thin more for lower PSI) |
| Small 0.2mm | Thin 20% – 30% + Per Volume. | 20 – 30 PSI, (Thin more for lower PSI) |
The Wicked Colors Line is good for both paint coverage, as well as, fine detail. But if you intend on using Wicked for detail work. Opt for the “Wicked Detail” line. It works better at lower PSI and for smaller tip sizes.
Createx Illustration Colors
| Airbrush Tip Size | Thinner To Paint | Suggested PSI |
|---|---|---|
| Large 0.5mm | Straight From The Bottle | 25 – 35 PSI (Thin for lower PSI) |
| Medium 0.35mm | Thin 5% – 15% Per Volume | 15 – 30 PSI (Thin more for lower PSI |
| Small 0.2mm | Thin 10% – 20% | 15 – 30 PSI (Thin more for lower PSI |
Createx Illustration Colors is recommended for detail oriented artwork. Though it works well for coverage, it was developed for detailed airbrush work.
Illustration Colors spray well through an airbrush of really any tip size. Even straight out of the bottle. However most prefer to thin the paint further.
Further Instruction
Paint reduction ratios will vary depending on the paint opacity, and finish.
For example, Opaque colors are likely to require more thinner in order to achieve best atomization and flow, when compared to transparent paints.
The above numbers are simply starting points. They should be treated as such.
Testing & Tinkering with PSI & Reducer levels will definitely be necessary to find the optimal ratio that works well for you.
That being said, I personally prefer to thin my paints (When working with Createx Airbrush Colors) somewhere between 50% to 75% some times a little more.
That’s 50% – 75% Thinner too 25% – 50% paint, Depending on if i’m working with opaque or transparent colors.
But when working with “Wicked Colors” I typically stay around 1:1 or 50% Thinner too 50% Paint. It’s not always exact but that’s the target zone. I guess you could say I like my paint well over-reduced…
Now when it comes to Air Pressure. I like to run at 30 PSI (Pound Per Square Inch) or less if I can. Which under most circumstances: The thinner the paint is, the less PSI you’ll need.
Now lets talk about a few of the products offered by Createx for manipulating the paint to your benefit…
Beneficial Createx Products
The cool thing about createx airbrush paint is that you have options when it comes to how you use the paint and the finished appearance of the paint.
Increase Transparency
By adding some 5601 Transparent Base additive (By Createx) to your createx airbrush paint, you can achieve a more transparent finish. The more 5601 you add to your paint the greater transparency you’ll achieve.
5601 Transparent Base also can be used as a protective inter coat between paint coats, or as a clear coat over your final artwork for lasting protection. Simply load up your airbrush with straight 5601 Transparent Base, and apply an even layer across your artwork.
Note, Transparent Base is not designed to be used as an automotive clear coat.
Seal & Protect (Top Coats)
4050 UVLS Gloss Clear – Works as both an adhesive primer on non-porous surfaces, and a clear top coat to protect your artwork. Will provide a Glossy Finish.
4051 UVLS Satin Clear – Works as both an adhesive primer on non-porous surfaces, and a clear top coat to protect your artwork. Will provide a Satin Clear Finish.
4052 UVLS Matte Clear – Works as both an adhesive primer on non-porous surfaces, and a clear top coat to protect your artwork. Will provide a Matte Finish.
Reduce Tip Dry
By using small amounts of 5607 Retarder (By Createx) you can reduce the amount of tip dry that occurs. Allowing for longer & more focused sessions between tip dry cleanings. If you don’t know what tip dry is, I have an article that explains tip dry in depth.
But simply put, “tip dry” is dry paint that builds up on the tip of the airbrush needle that begins to hinder paint from leaving the nozzle. Essentially plugging the nozzle to a degree.
Tip Dry will begin to make your airbrush less responsive the worse it gets.
How To Clean Createx Airbrush Paint
Proper clean up is the most important part of utilizing an airbrush. Because, as you likely know, a clean airbrush is a happy airbrush. A dirty one will fight you like crazy…
Lucky for use, Createx has developed their own cleaning solutions that work wonders against their paints.
Createx Cleaning Solutions
- 4008 Restorer – Used to clean out stubborn, dried paint in the airbrush. Before use remove all seals, and any plastic or rubber components. 4008 will likely begin dissolving such parts.
- 5618 Airbrush Cleaner – A more mild cleaning agent compared to 4008. Recommended for flushing the airbrush between colors, or at the end of an airbrush session.
I personally use my own home brewed thinner / cleaner for clean up of Createx paints in place of 5618, just for common use. However, I still prefer to use 4008 Restorer once my airbrush begins to feel unresponsive and is in great need of a deep cleaning.
The home brew cleaning recipe (Linked above) just helps to save a few bucks on cleaning solution.
But if you’d prefer to use the solutions offered by Createx there is a video below discussing each cleaning agent in greater detail.
How To Store Createx Airbrush Paints
Store Createx paints in a cool dry location, away from any windows (Keep out of direct sunlight). Same goes for any of the additives.
It’s ideal if you agitate the paint every month or 2 to keep if from forming clumps & / Or separating.
In most cases, paint that has been reduced (Paint that has reducer in it) will have a shorter life span then paints that are free from reducer or any other additive. It’s important that you only reduce the amount of paint you intend on using within a 24 hour period.
Keep colors air tight at all times other then when poring paint from the bottle.
Conclusion
There is a lot to learn when it comes to airbrushing and a significant portion of that learning curve is spent figuring out the paint line you intend on using, and how to manipulate it to your liking.
The information above should give you a good starting point to using the following three createx airbrush paint lines:
- Createx “Airbrush Colors”
- Createx “Wicked Colors”
- Createx “Illustration Colors”
But it’s very likely you’ll have to spend some time tinkering with the paint viscosity, and air pressure before you find your groove. I can honestly say, Createx (in my opinion) is one of the top dog’s when it comes to airbrush paints (so to say). But the paints can take some time to learn, so be patient.
For further instruction on each of the following paint lines refer to the user guide’s by Createx. (linked below)
- Further Instruction On Using Createx Airbrush Colors
- Further Instruction On Using Createx Wicked Colors
- Further Instruction On Using Createx Illustration Colors
Anyway, I hope you were able to find some value here! If you have any further questions regarding the airbrush do be sure to take a look around the website. Airbrush Insider is dedicated to helping all in the airbrush community!
This is Colt signing off!
Check Out Some Of My Favorite Airbrush Equipment: